Mazda MX-5 Trickle Charge Socket and cable |
|
|
I wanted to add a discreet charging port so I could hook the car up to a trickle charger or solar panel, I knew it would be sitting for periods of time and I had battery issues on the Smart in similar circumstances. I had been trying to think of places to install a socket, after much thinking I came up with the solution.
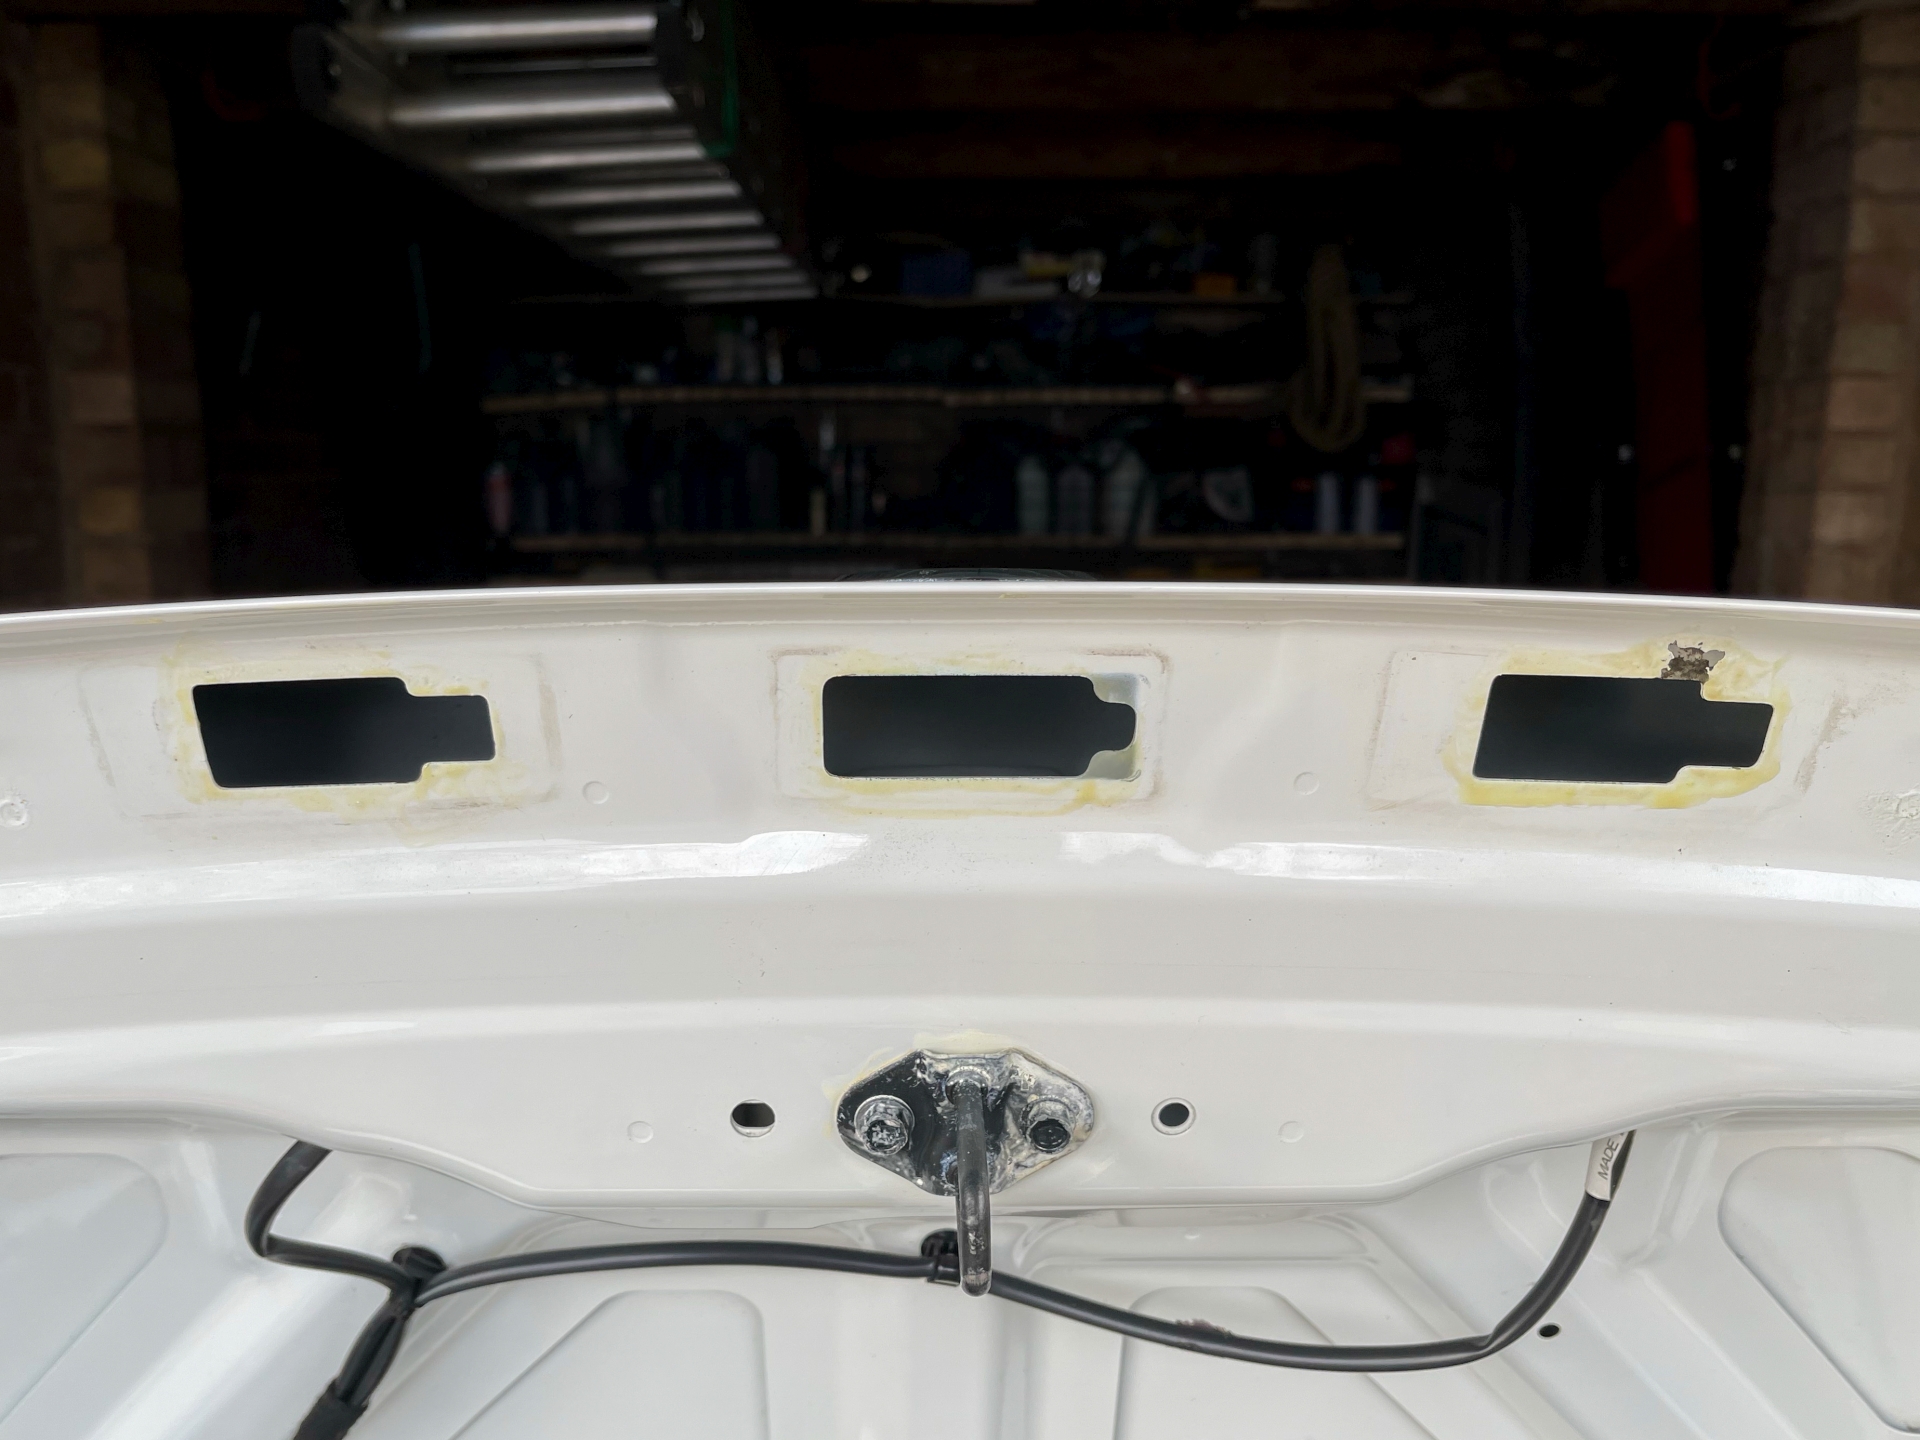
The boot lid of the NC has the number plate lights fitted into it and has three cutouts. I don't know why it has three cutouts, from what I can find all countries used a pair of lights rather than a single light or three lights. It doesn't matter, but UK cars have a blanking plate in the centre. That plate seems ideal for hiding a charging connector.
I already have a CTEK charger, their connectors are nice and robust and it's easy to get a male connector with a long lead by just buying an extension. It would also give me a quick way of seeing the battery status by opening the boot lid, handy if mostly unnecessary. I measured the blanking plate and the connector would fit. I also noted the part number so I can buy a replacement.
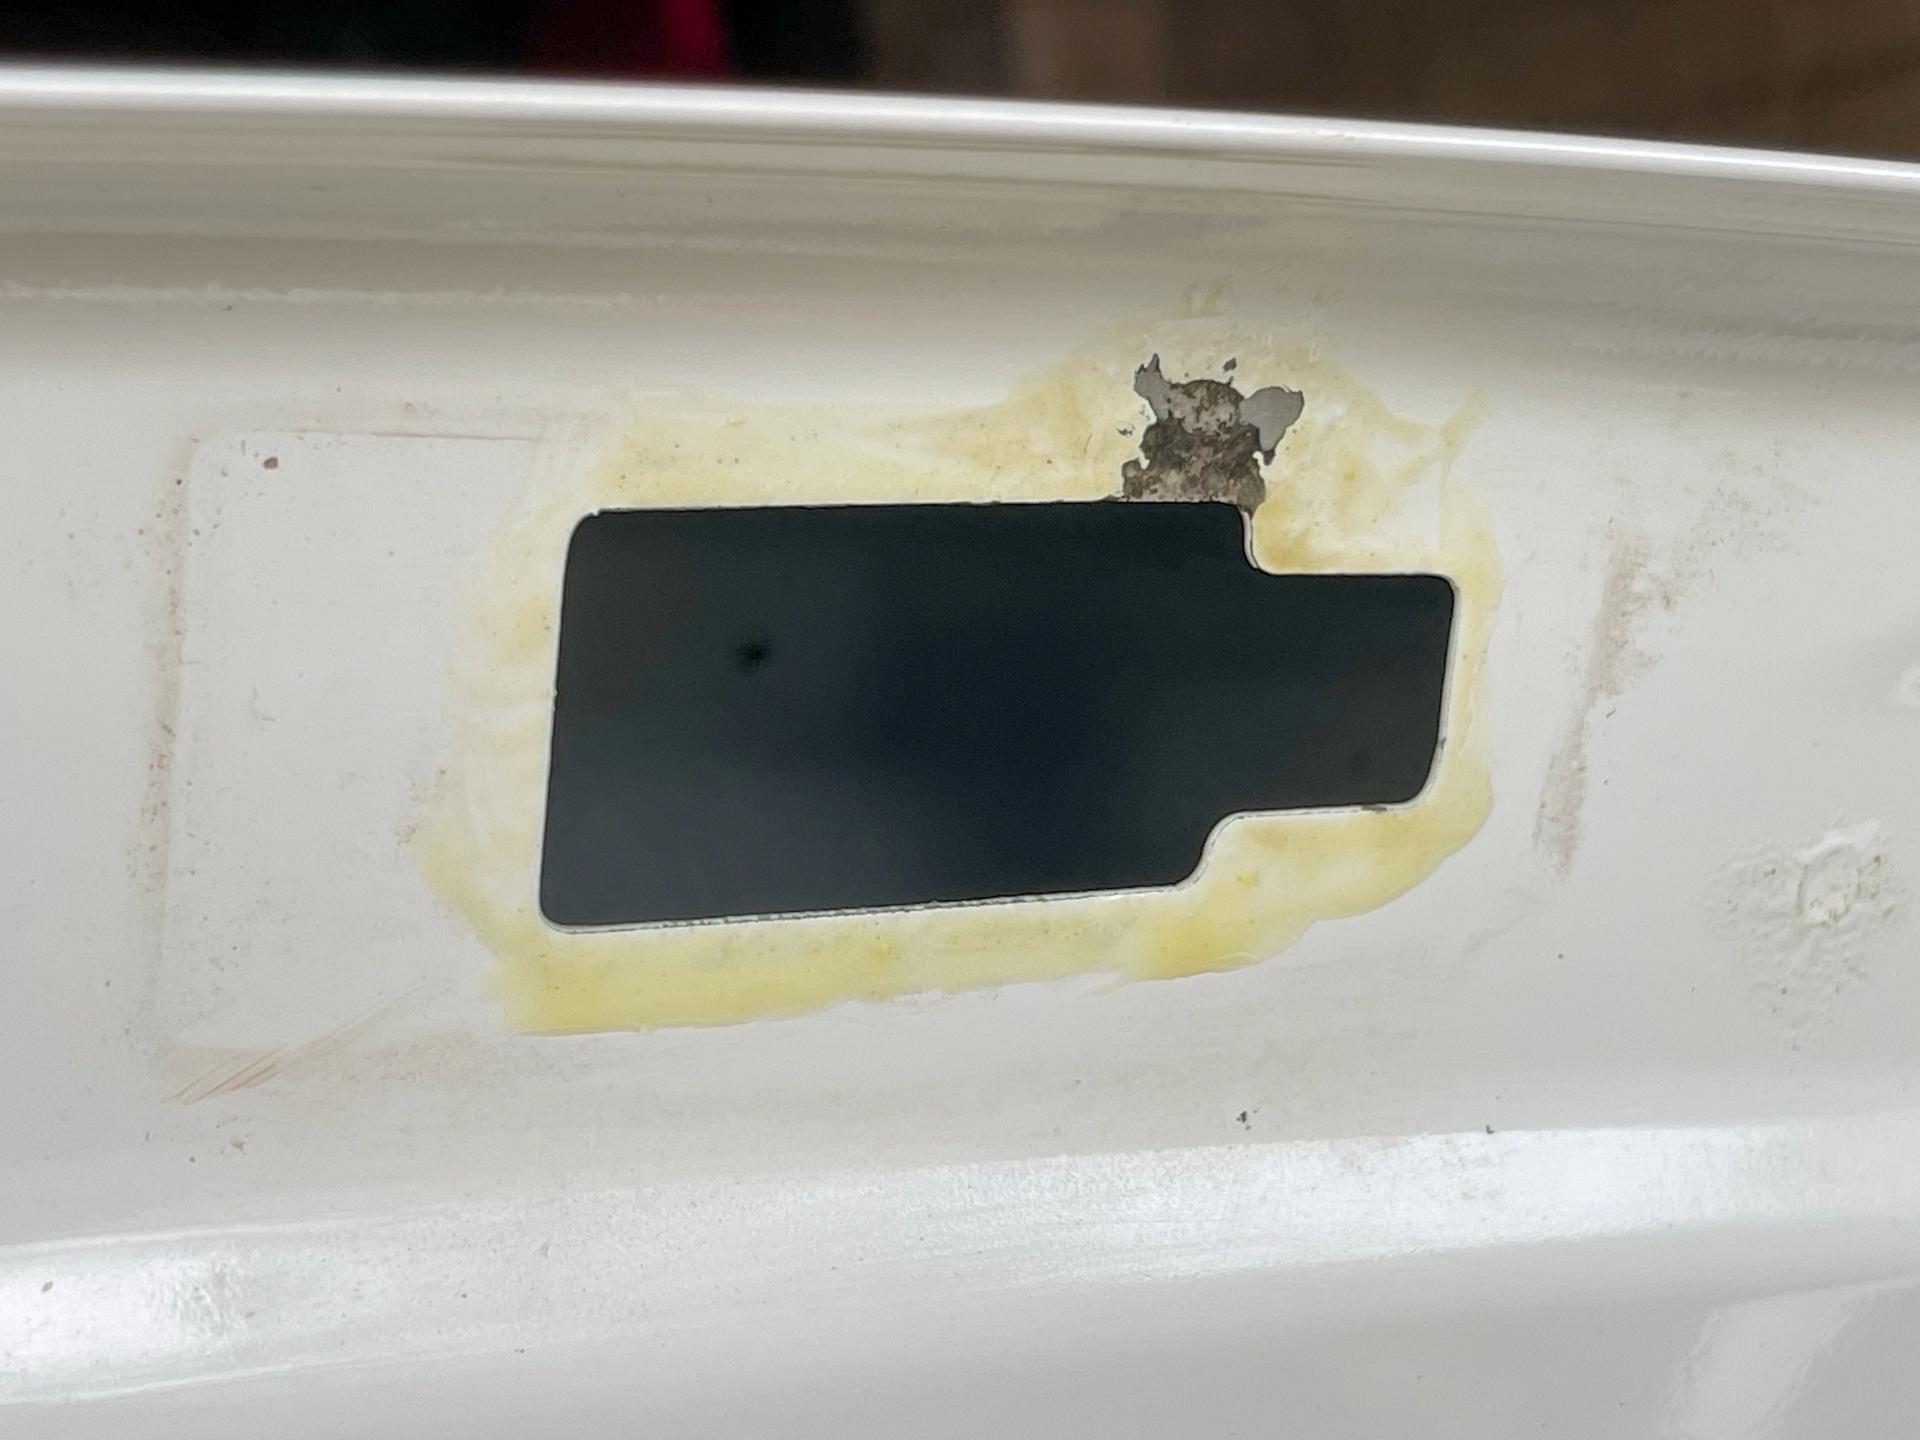
With all of this in mind I took the number plate lights and blanking plate out. I had already looked up a video of how they come out and that conveniently told me that they're a common rust spot on the NC. Not surprising as I already treated a couple of spots here and they're exposed to the elements. Despite being a steel boot lid, mine isn't so terrible. This is the worst one.

However, I had some Evapo-rust gel and it did a nice job before so I may as well put some on there. Worst case is it bought me more time to sand and re-paint this area. I removed some of the bubbled paint and applied the gel.
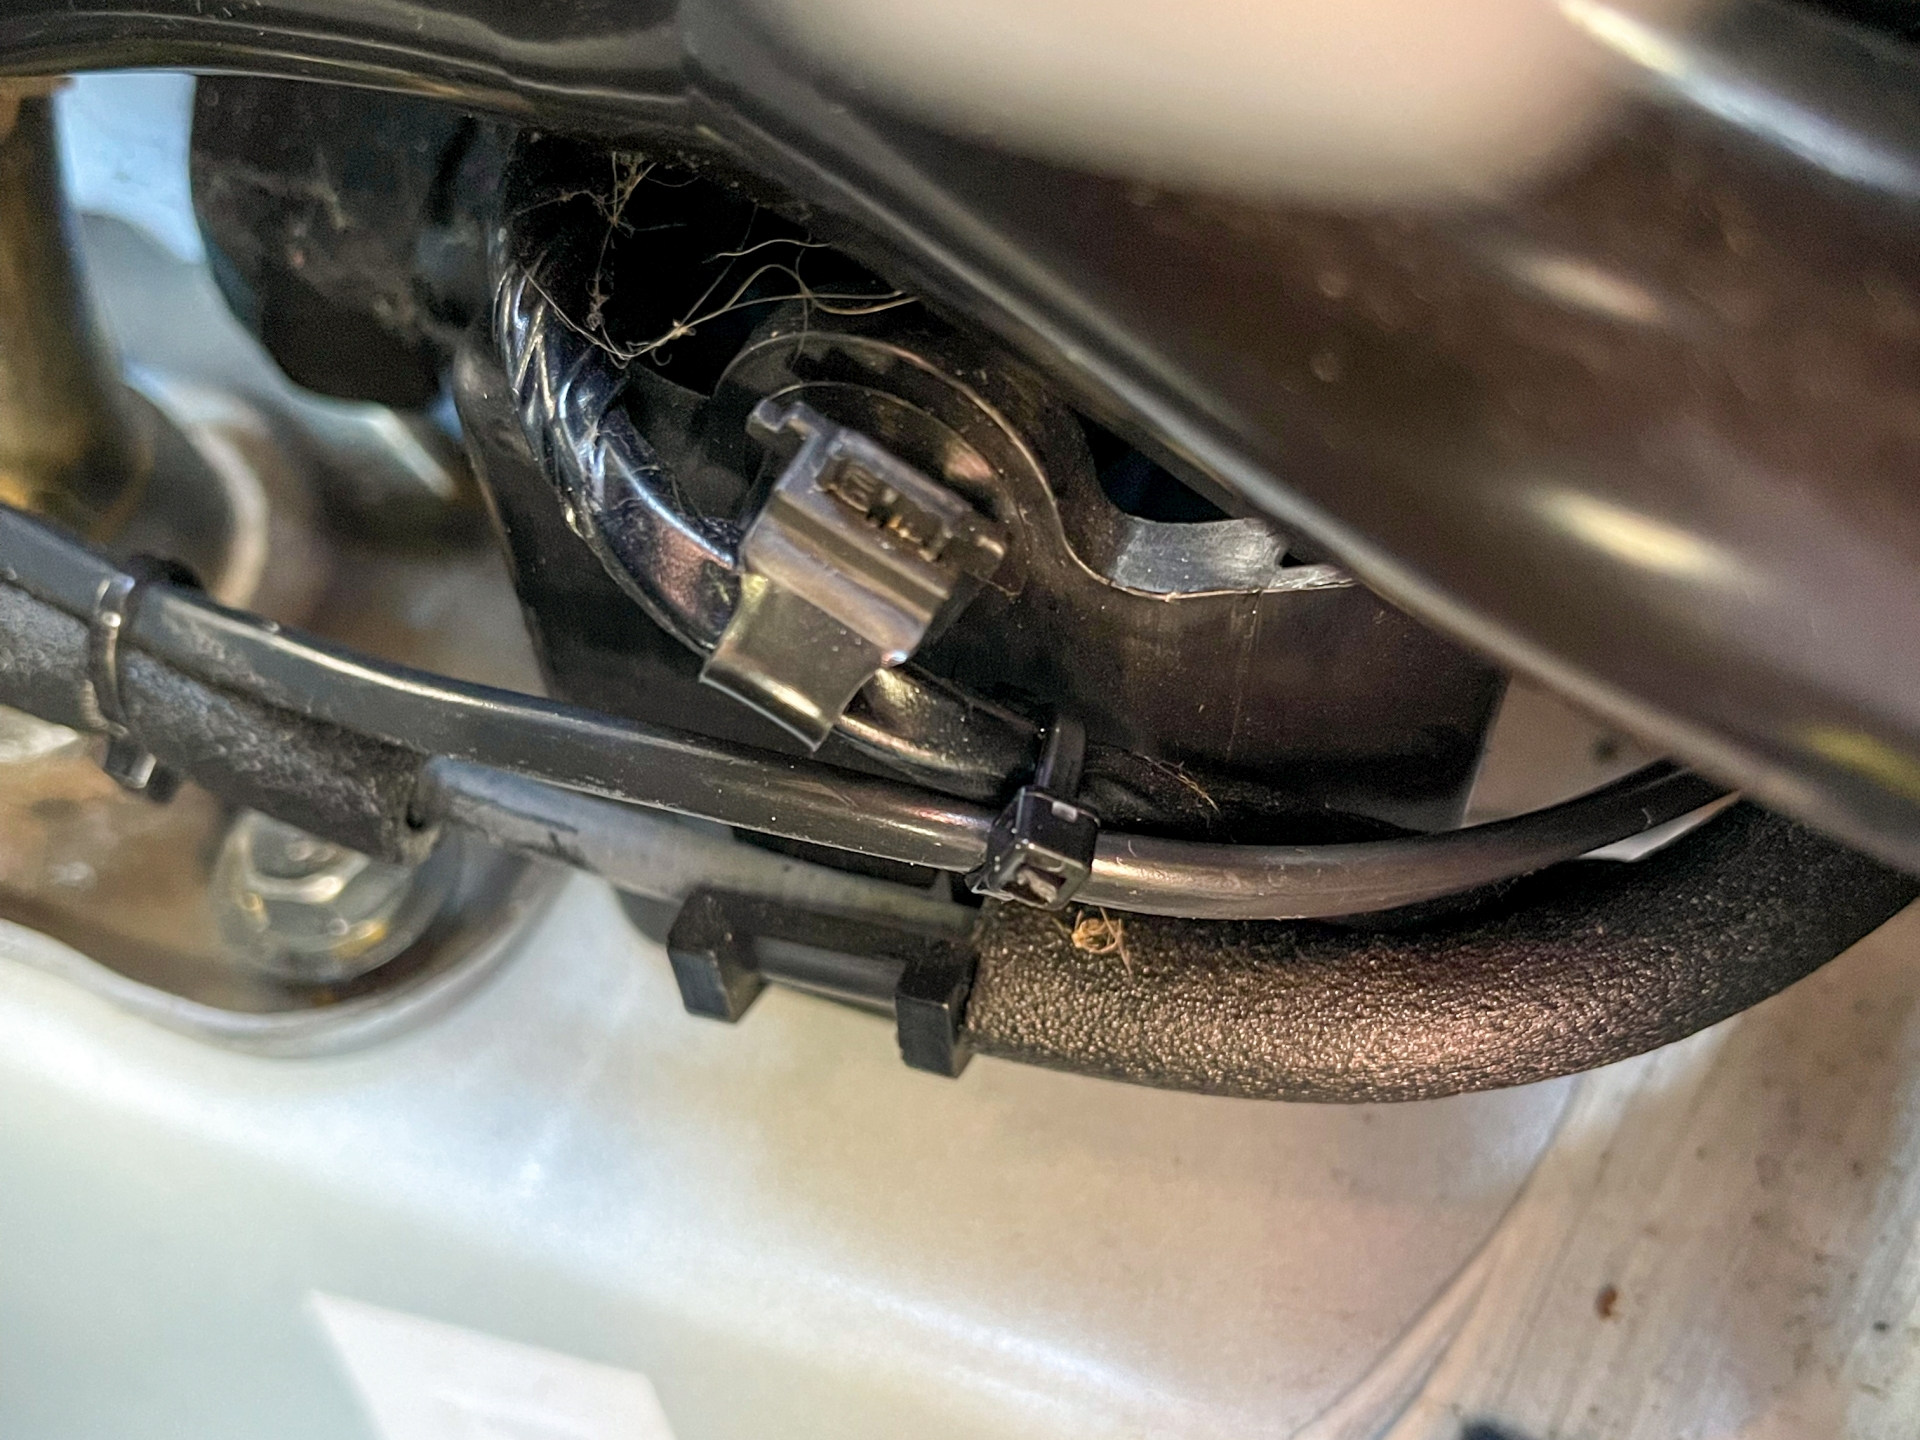
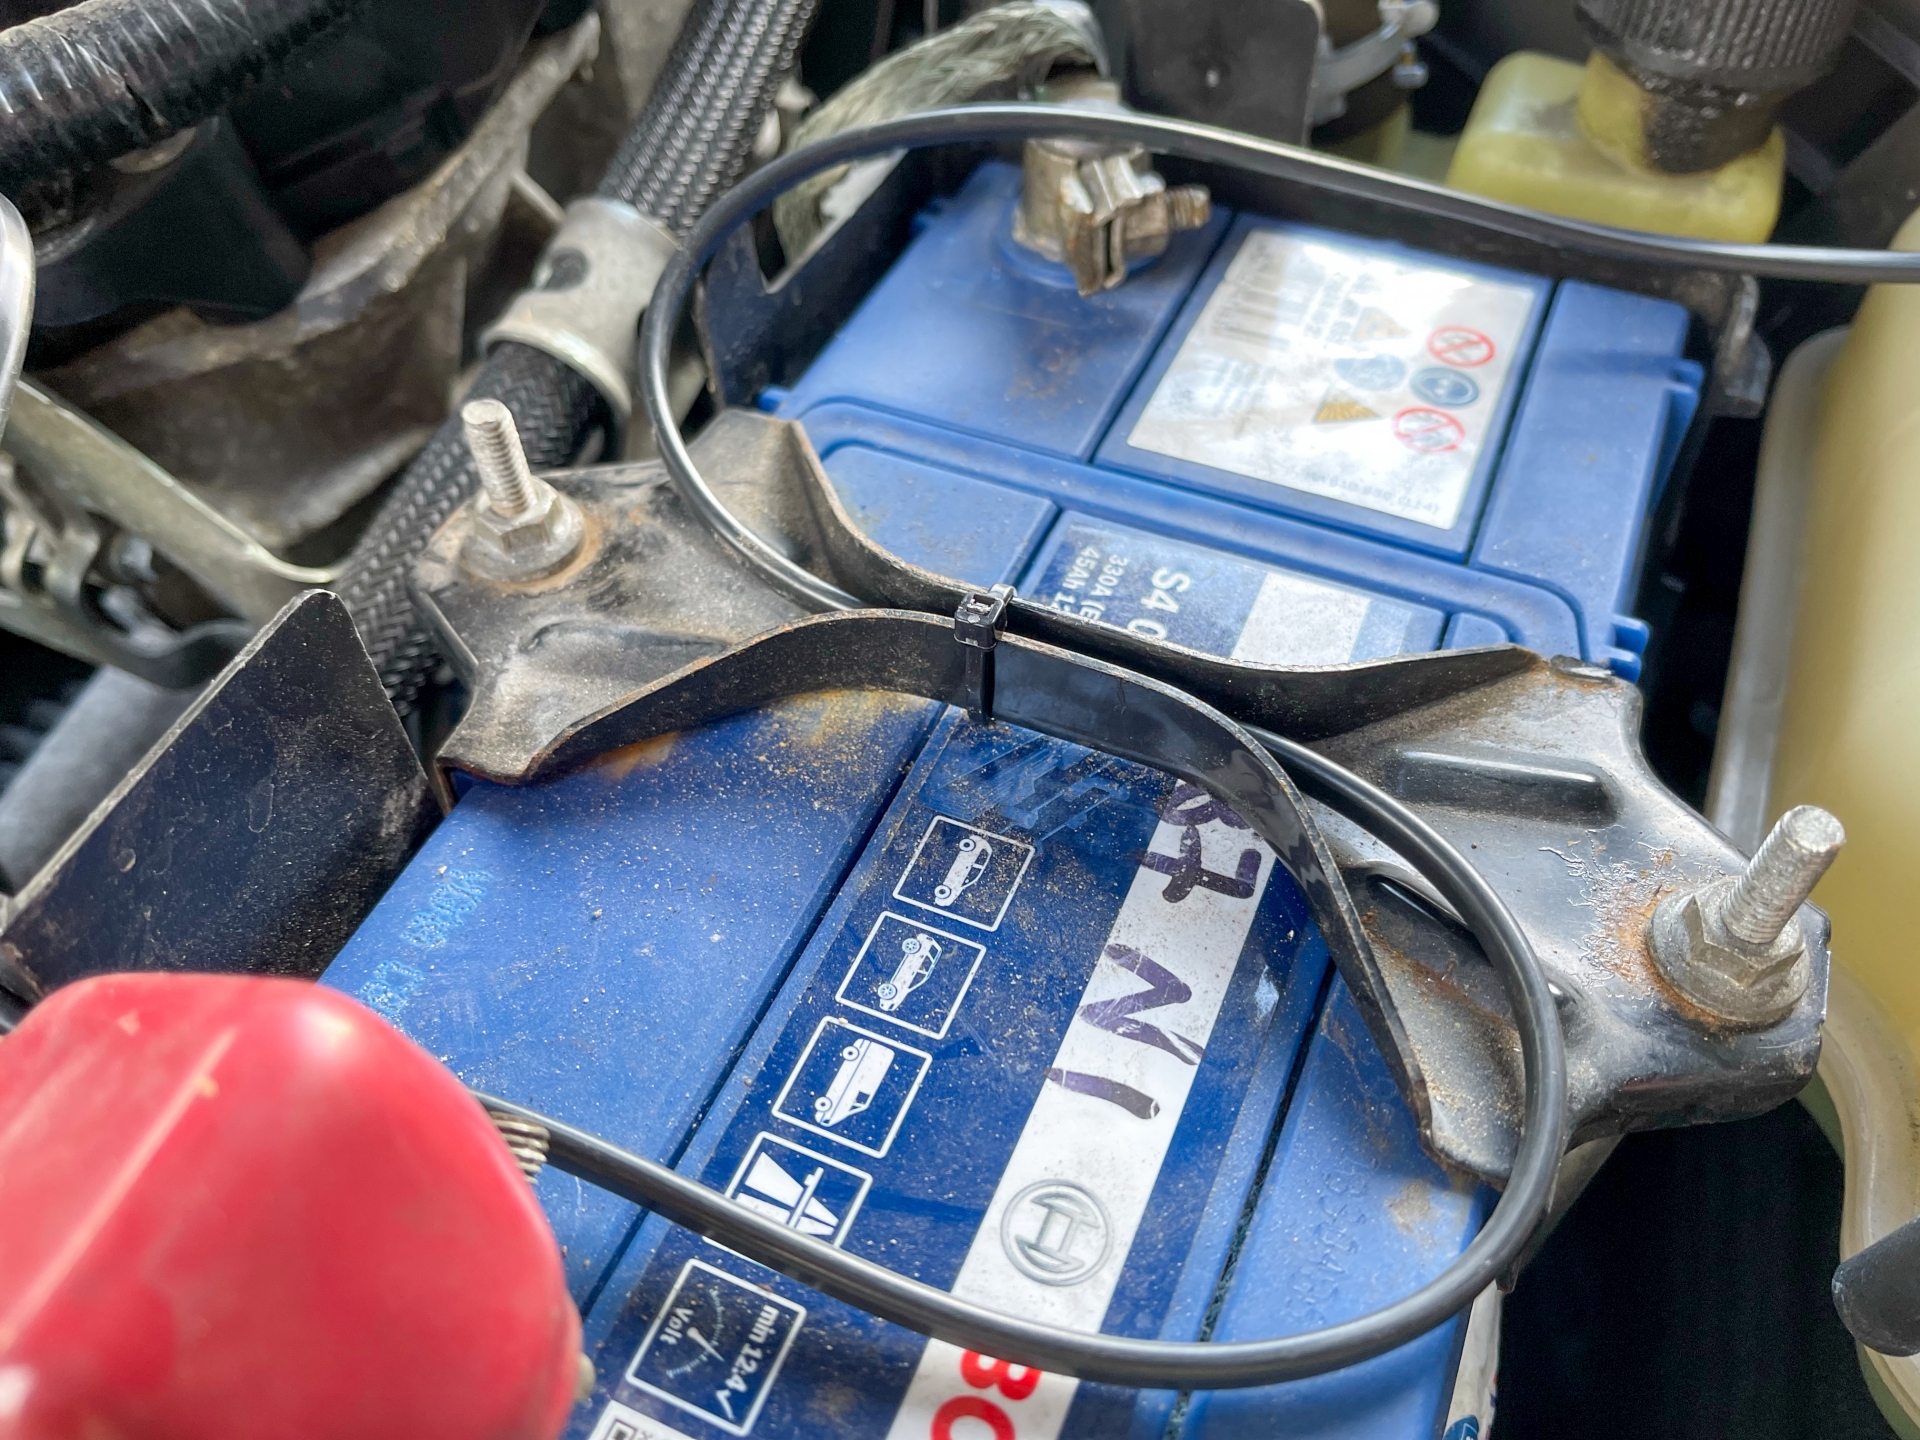
Still working towards the idea of having a charging port on the back, I next wanted to see if I have a way to feed power to the front. The car has reverse sensors, so I wondered if those would have a 12V feed I could piggy-back on. In some ways it's a shame the NC doesn't have the battery in the back like the previous cars. In other ways it's not, as having a lead acid battery in the boot can lead to rot, stinky interior and more electrical issues.
I removed all of the trim (noting lots of missing trim clips, I will buy some more) and checked out the wiring. It's quite neat, looks like it's probably a dealer option rather than DIY fitment.
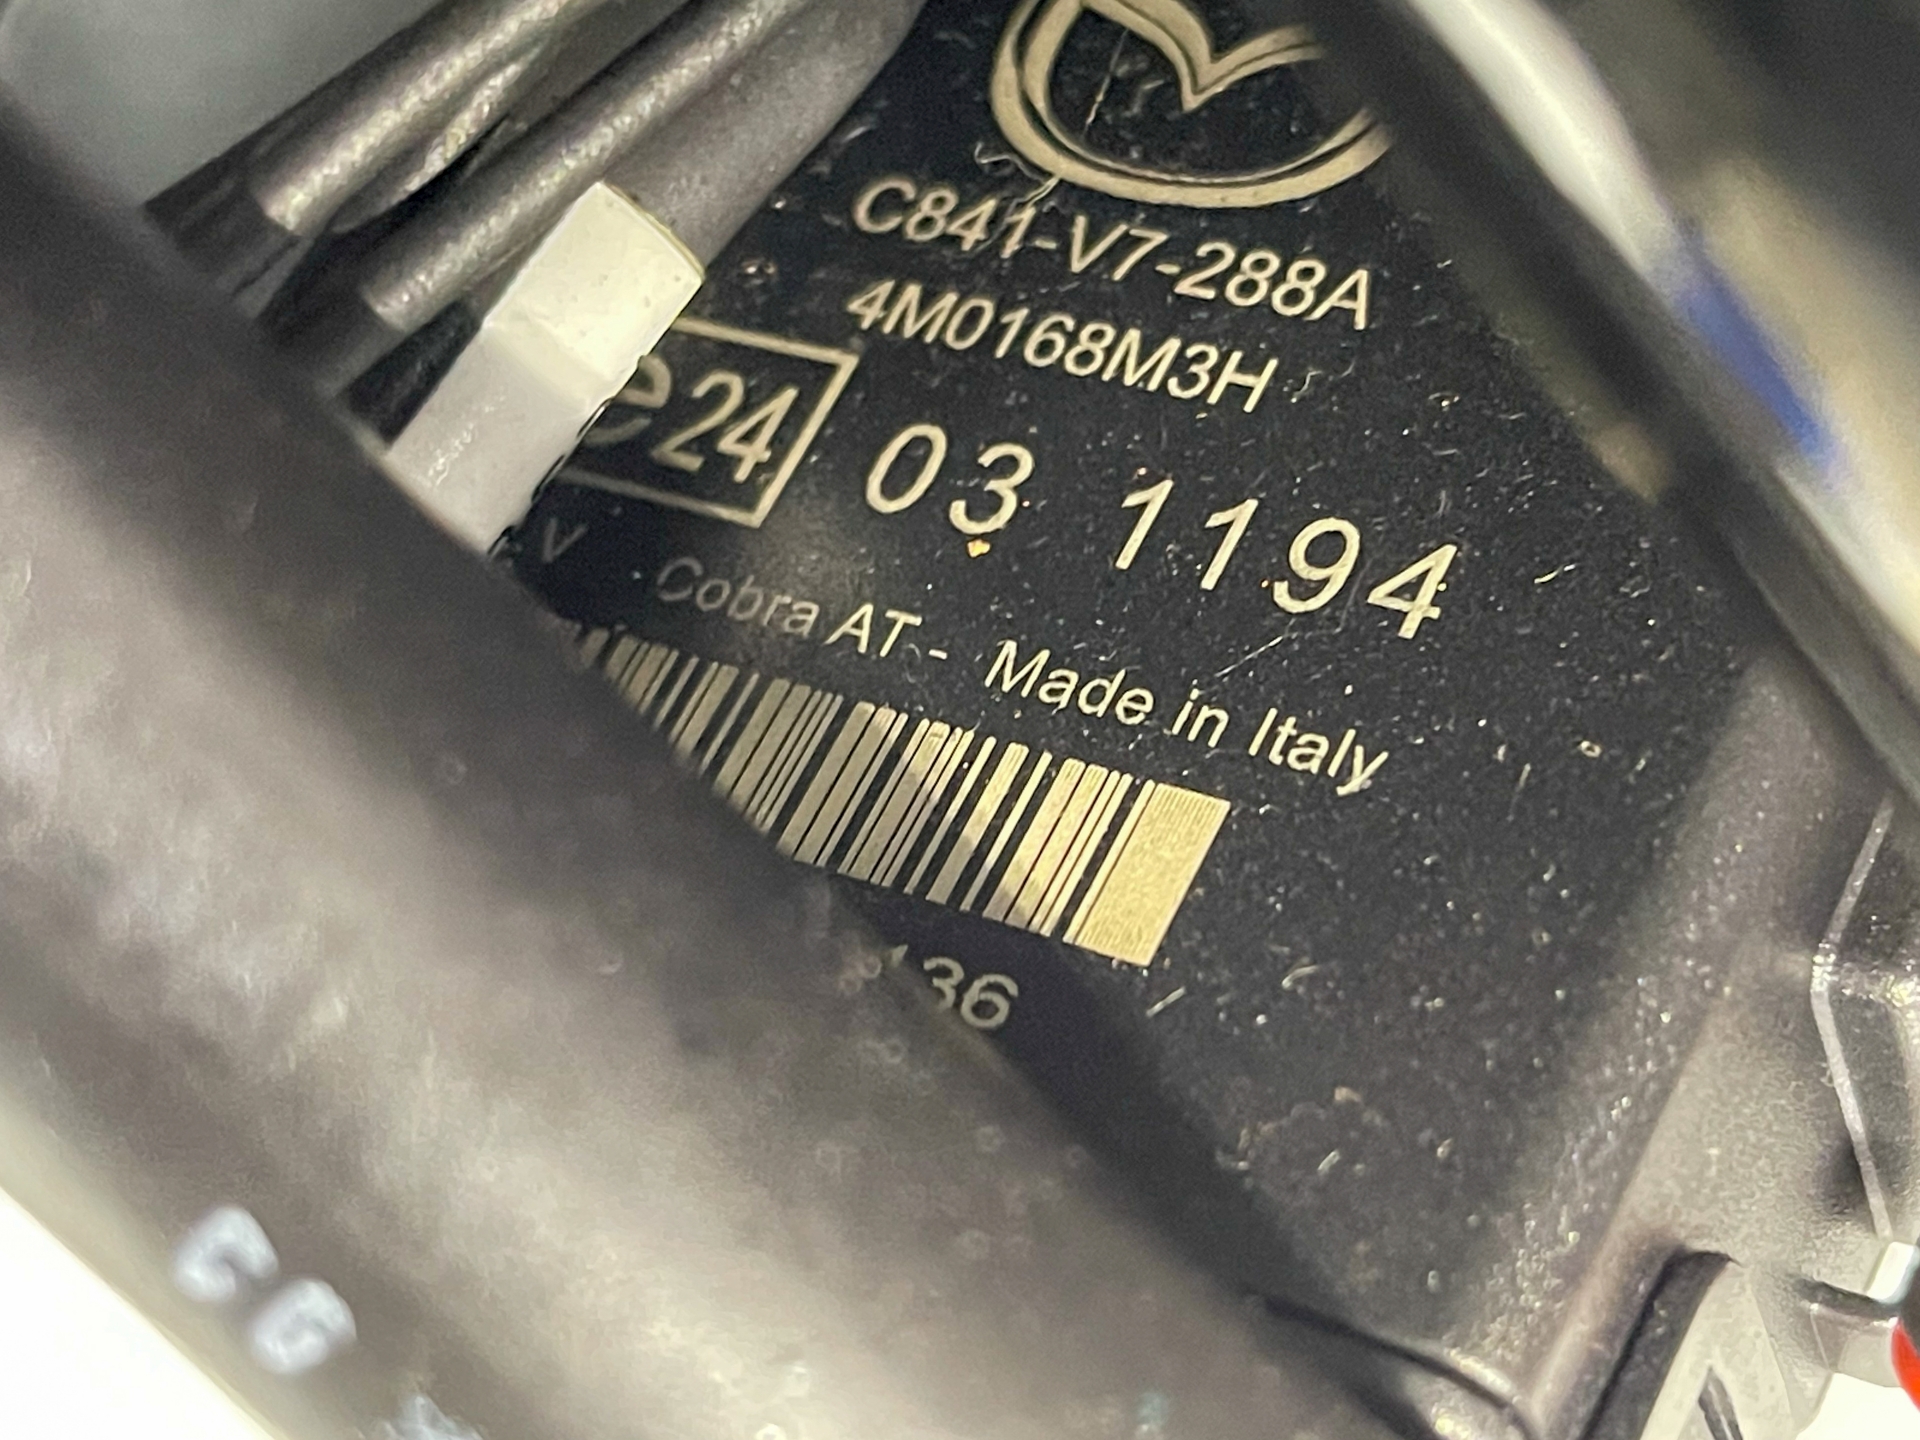
The module is behind the metal panel, which had sharp edges and cut my finger. With the panel removed I could see the module, a genuine Mazda unit that is apparently commonly found in the Mazda 3.
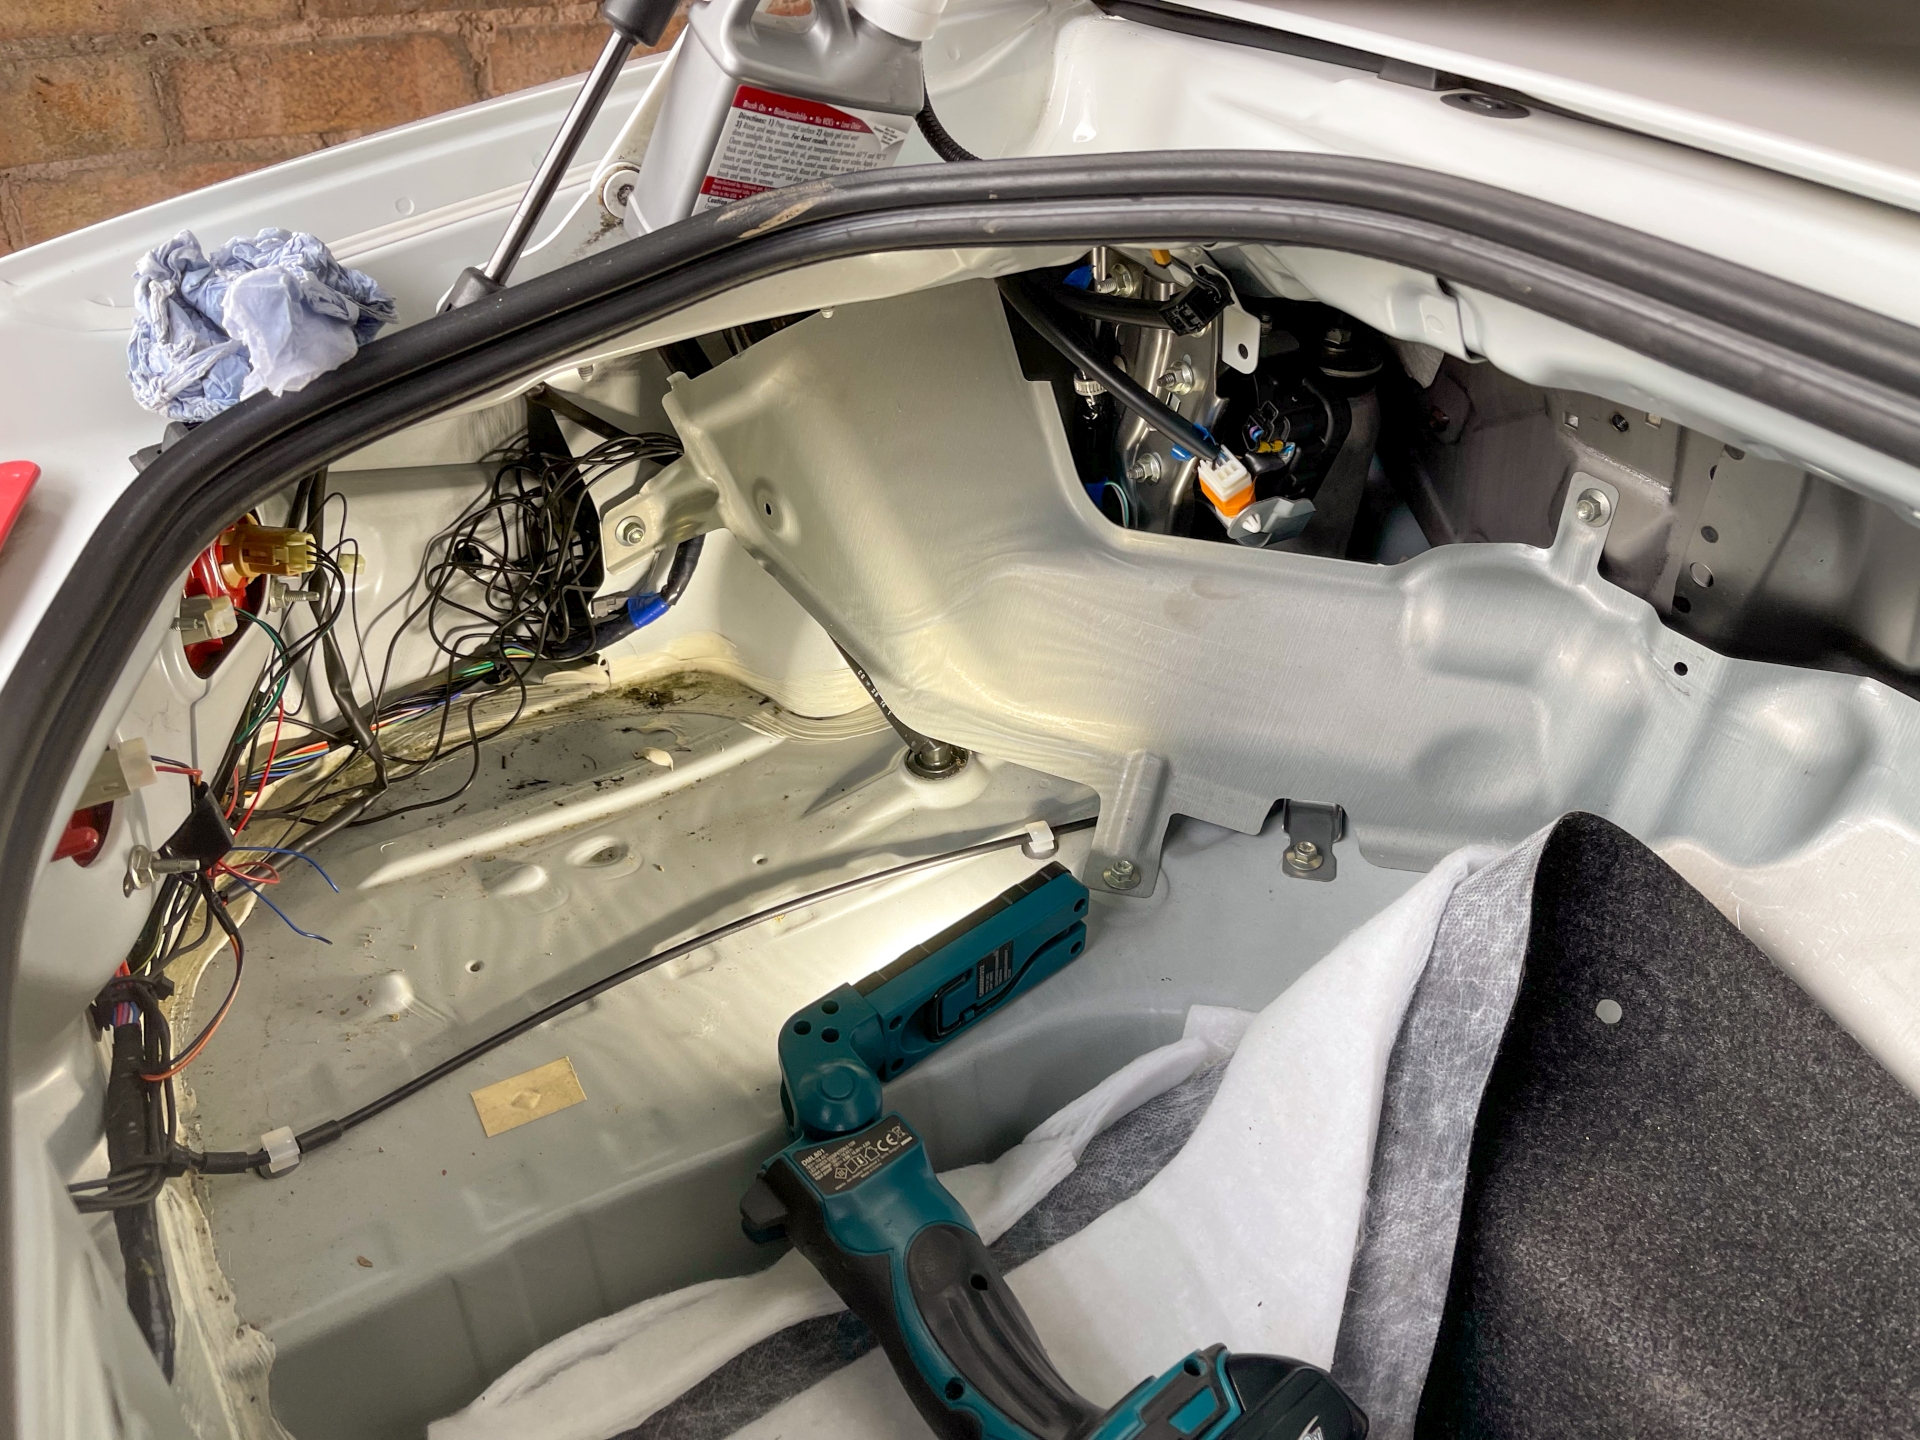
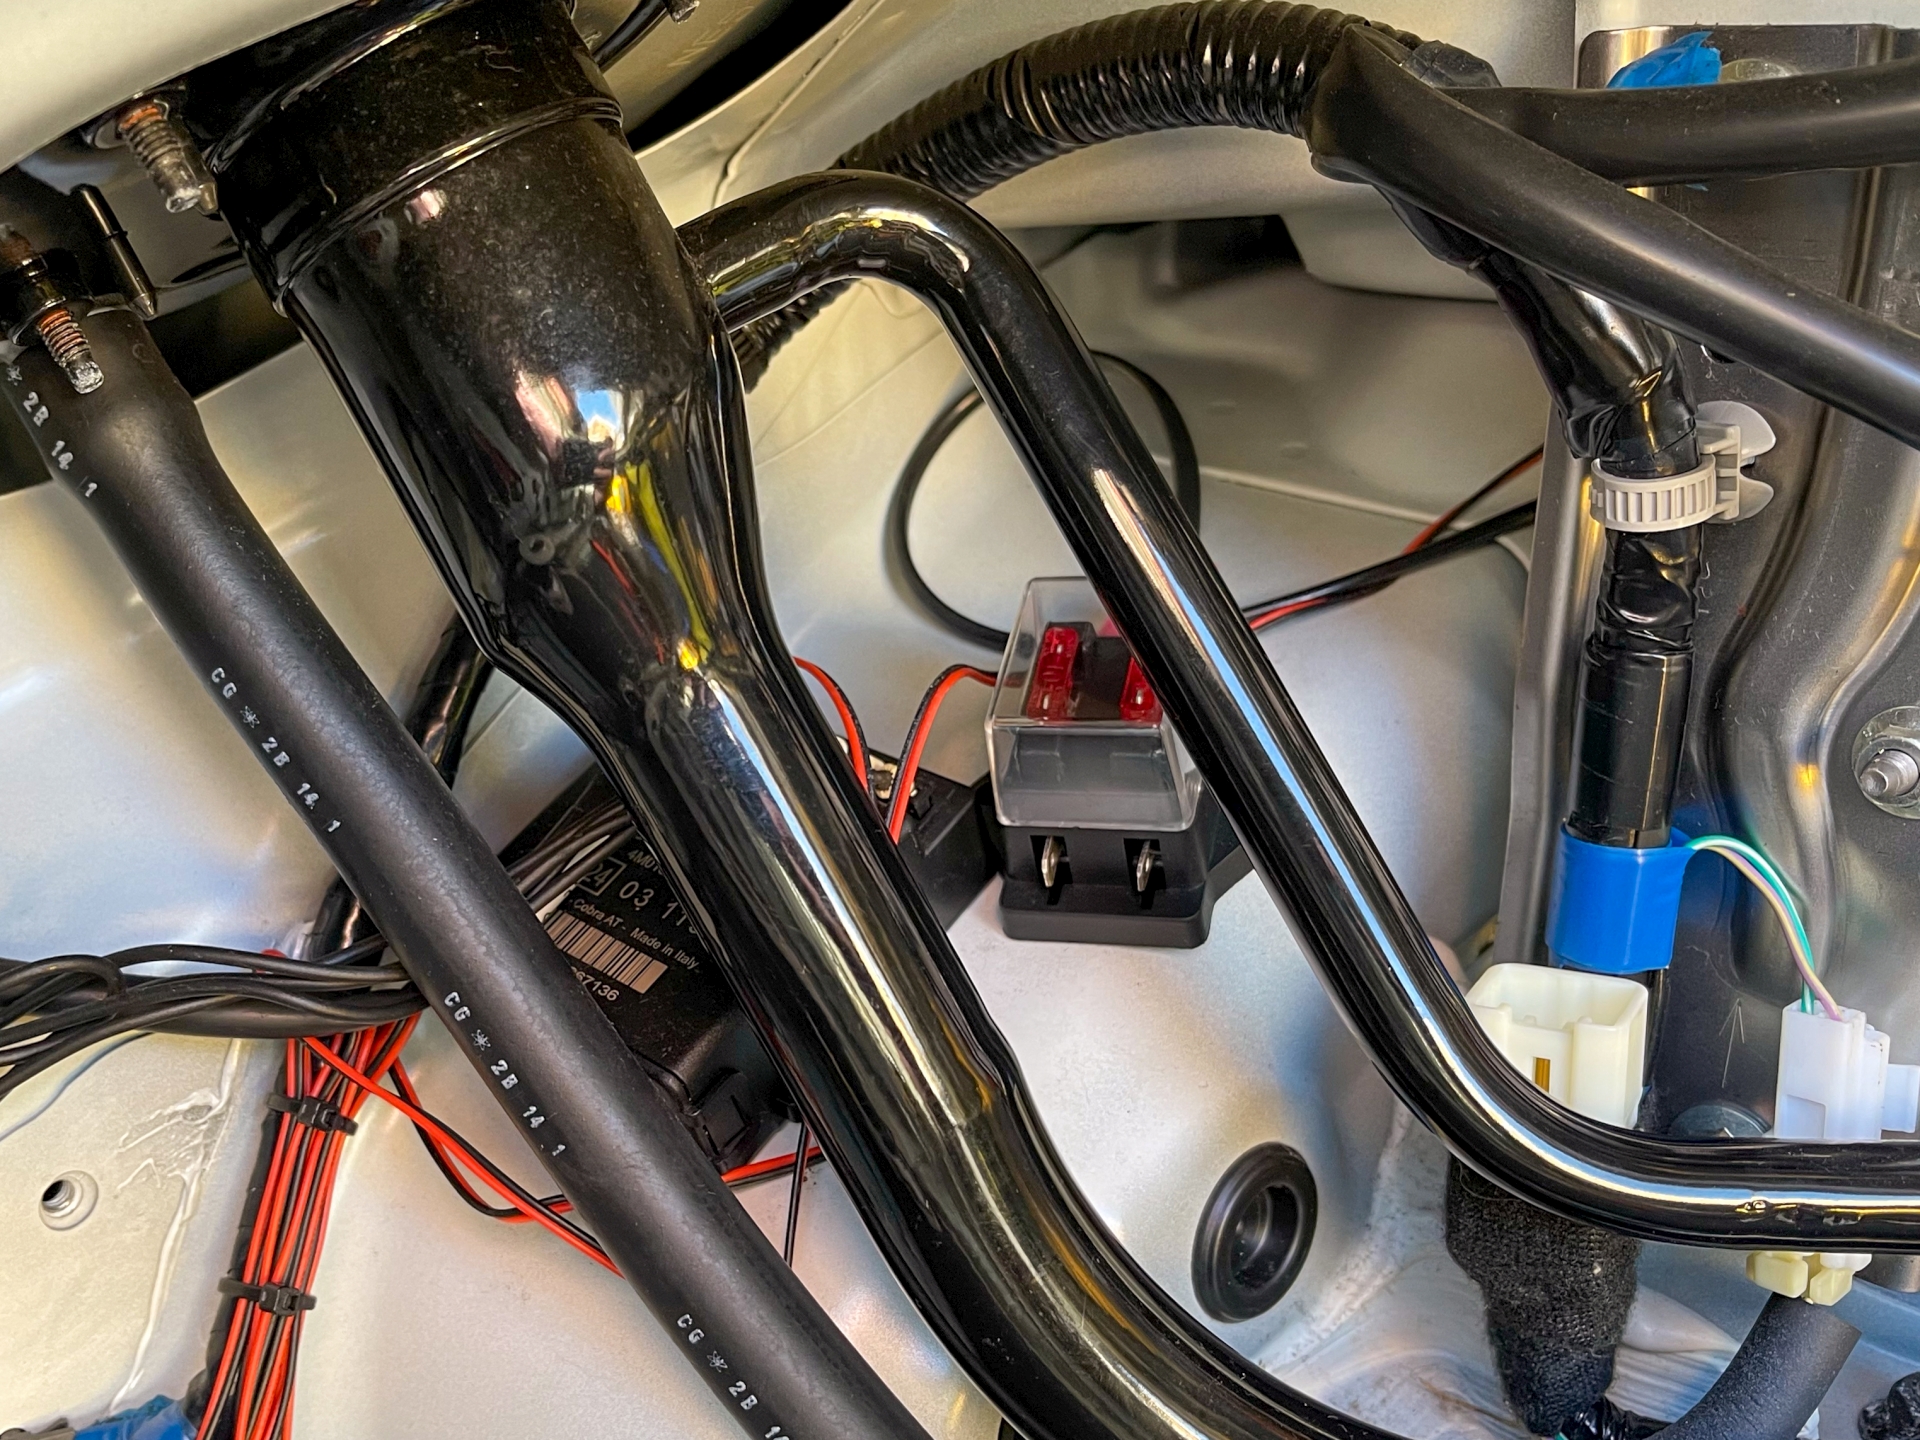
Unfortunately, it just steals power from the reverse light to operate the module. Clever enough I suppose but it means I didn't have a spare feed I can use and would need to run a pair of cables through the car to the battery. I then bought the CTEK panel connector, a fuse/connector block and a reel of twin core cable suitable for 15A, just in case it spiked for some reason.
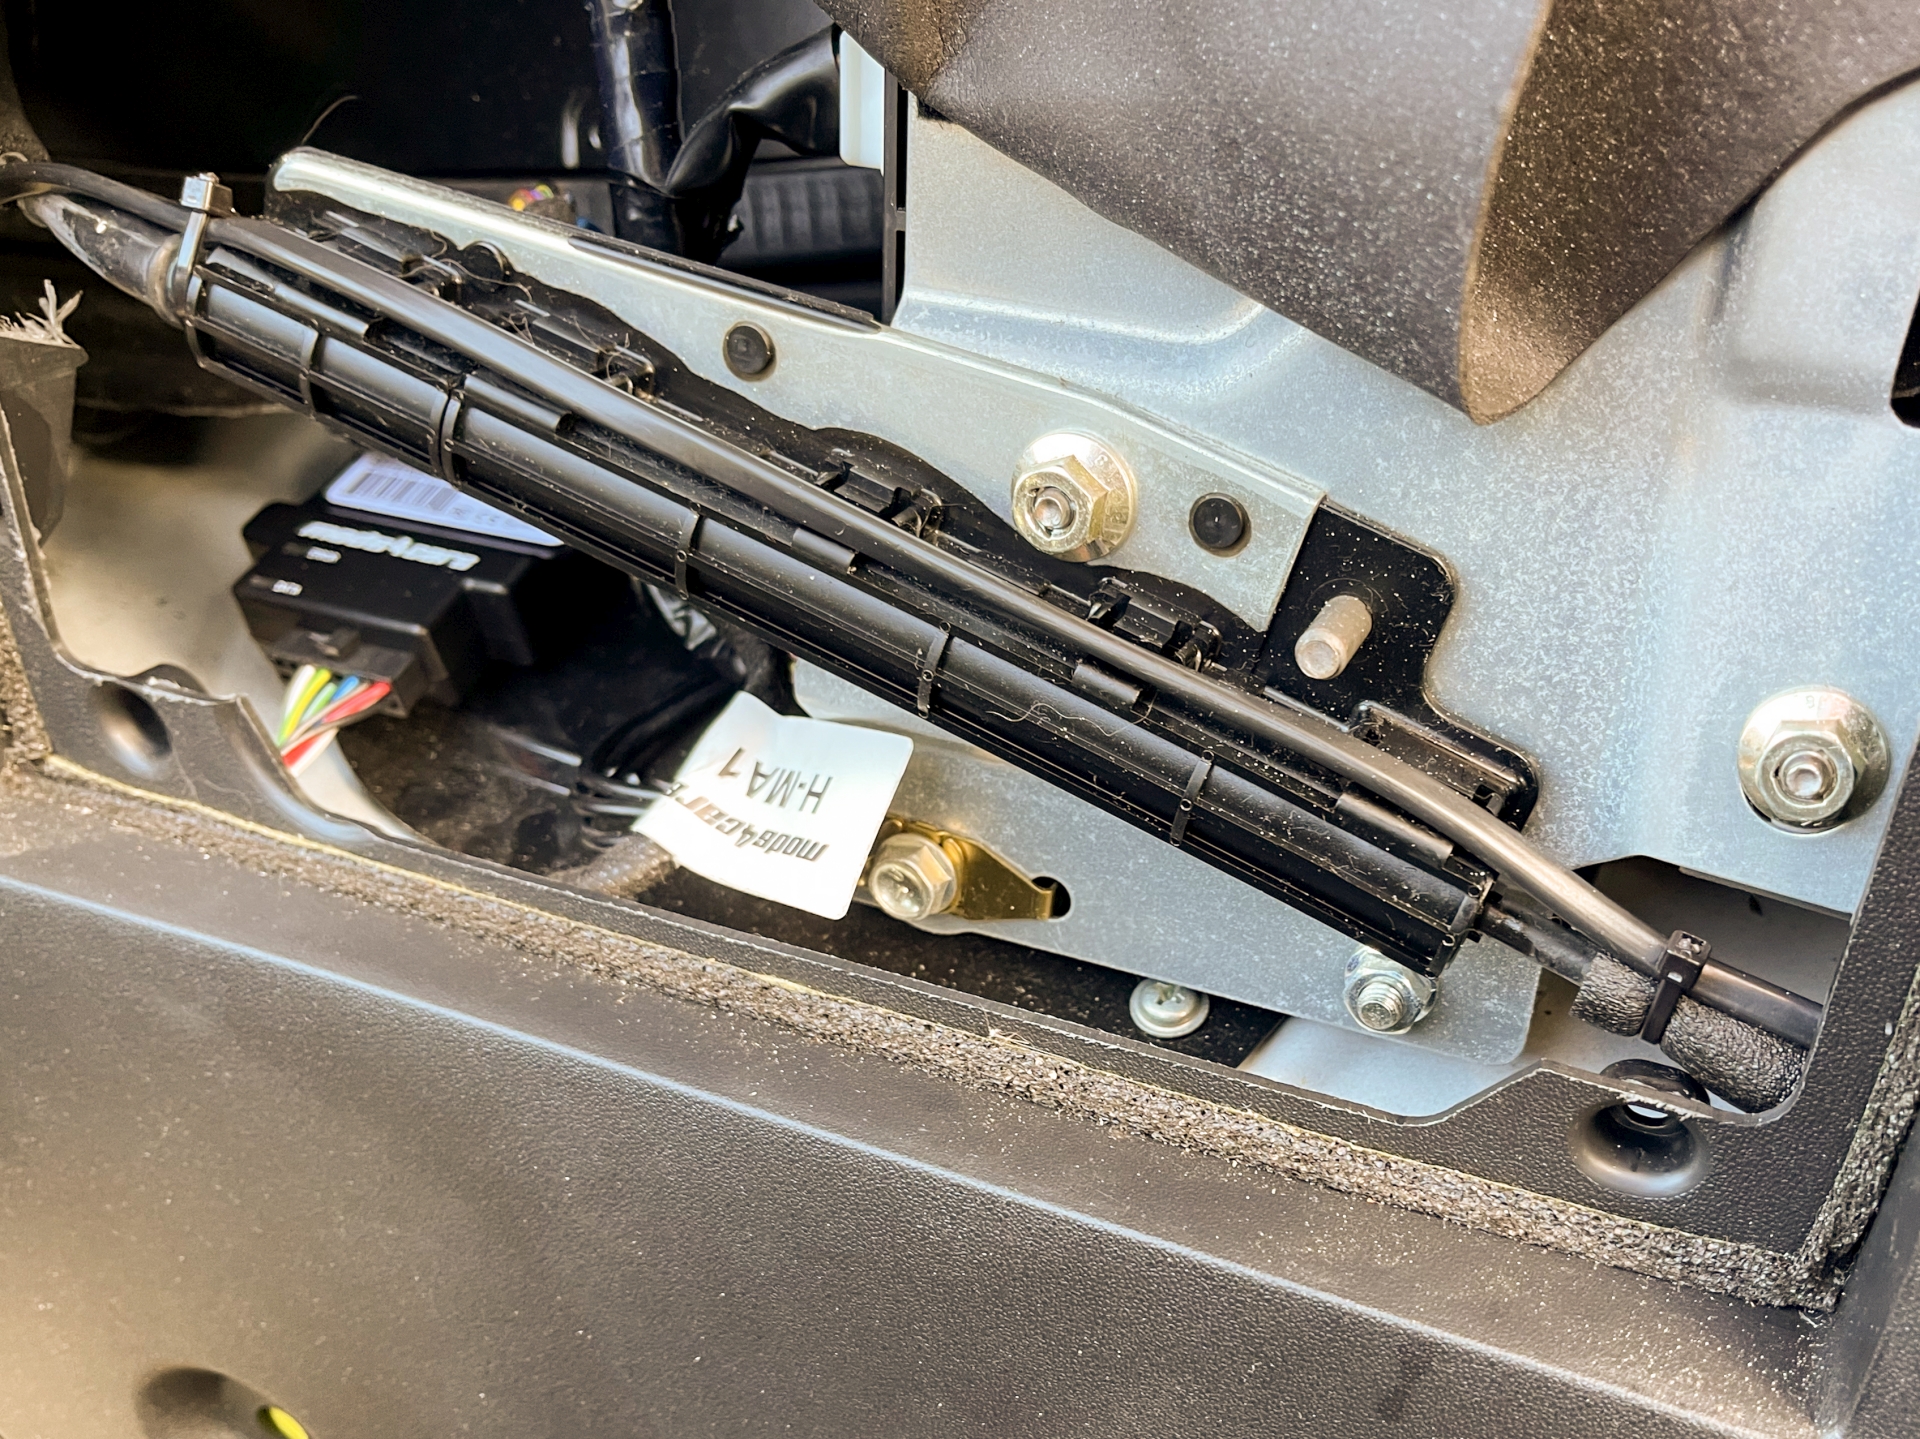
First thing was to run the cable through the car to the battery, meaning I had to remove a lot of interior trim. It's amazing how quickly an MX-5 comes apart once you start pulling the trim clips and, to be completely honest, how cheap a lot of the parts feel. I think I'm used to more substantial parts that come in Land Rovers, where weight and cost aren't really big concerns. The Smart did have quite cheaply made parts too but I never got around to tearing the interior apart.
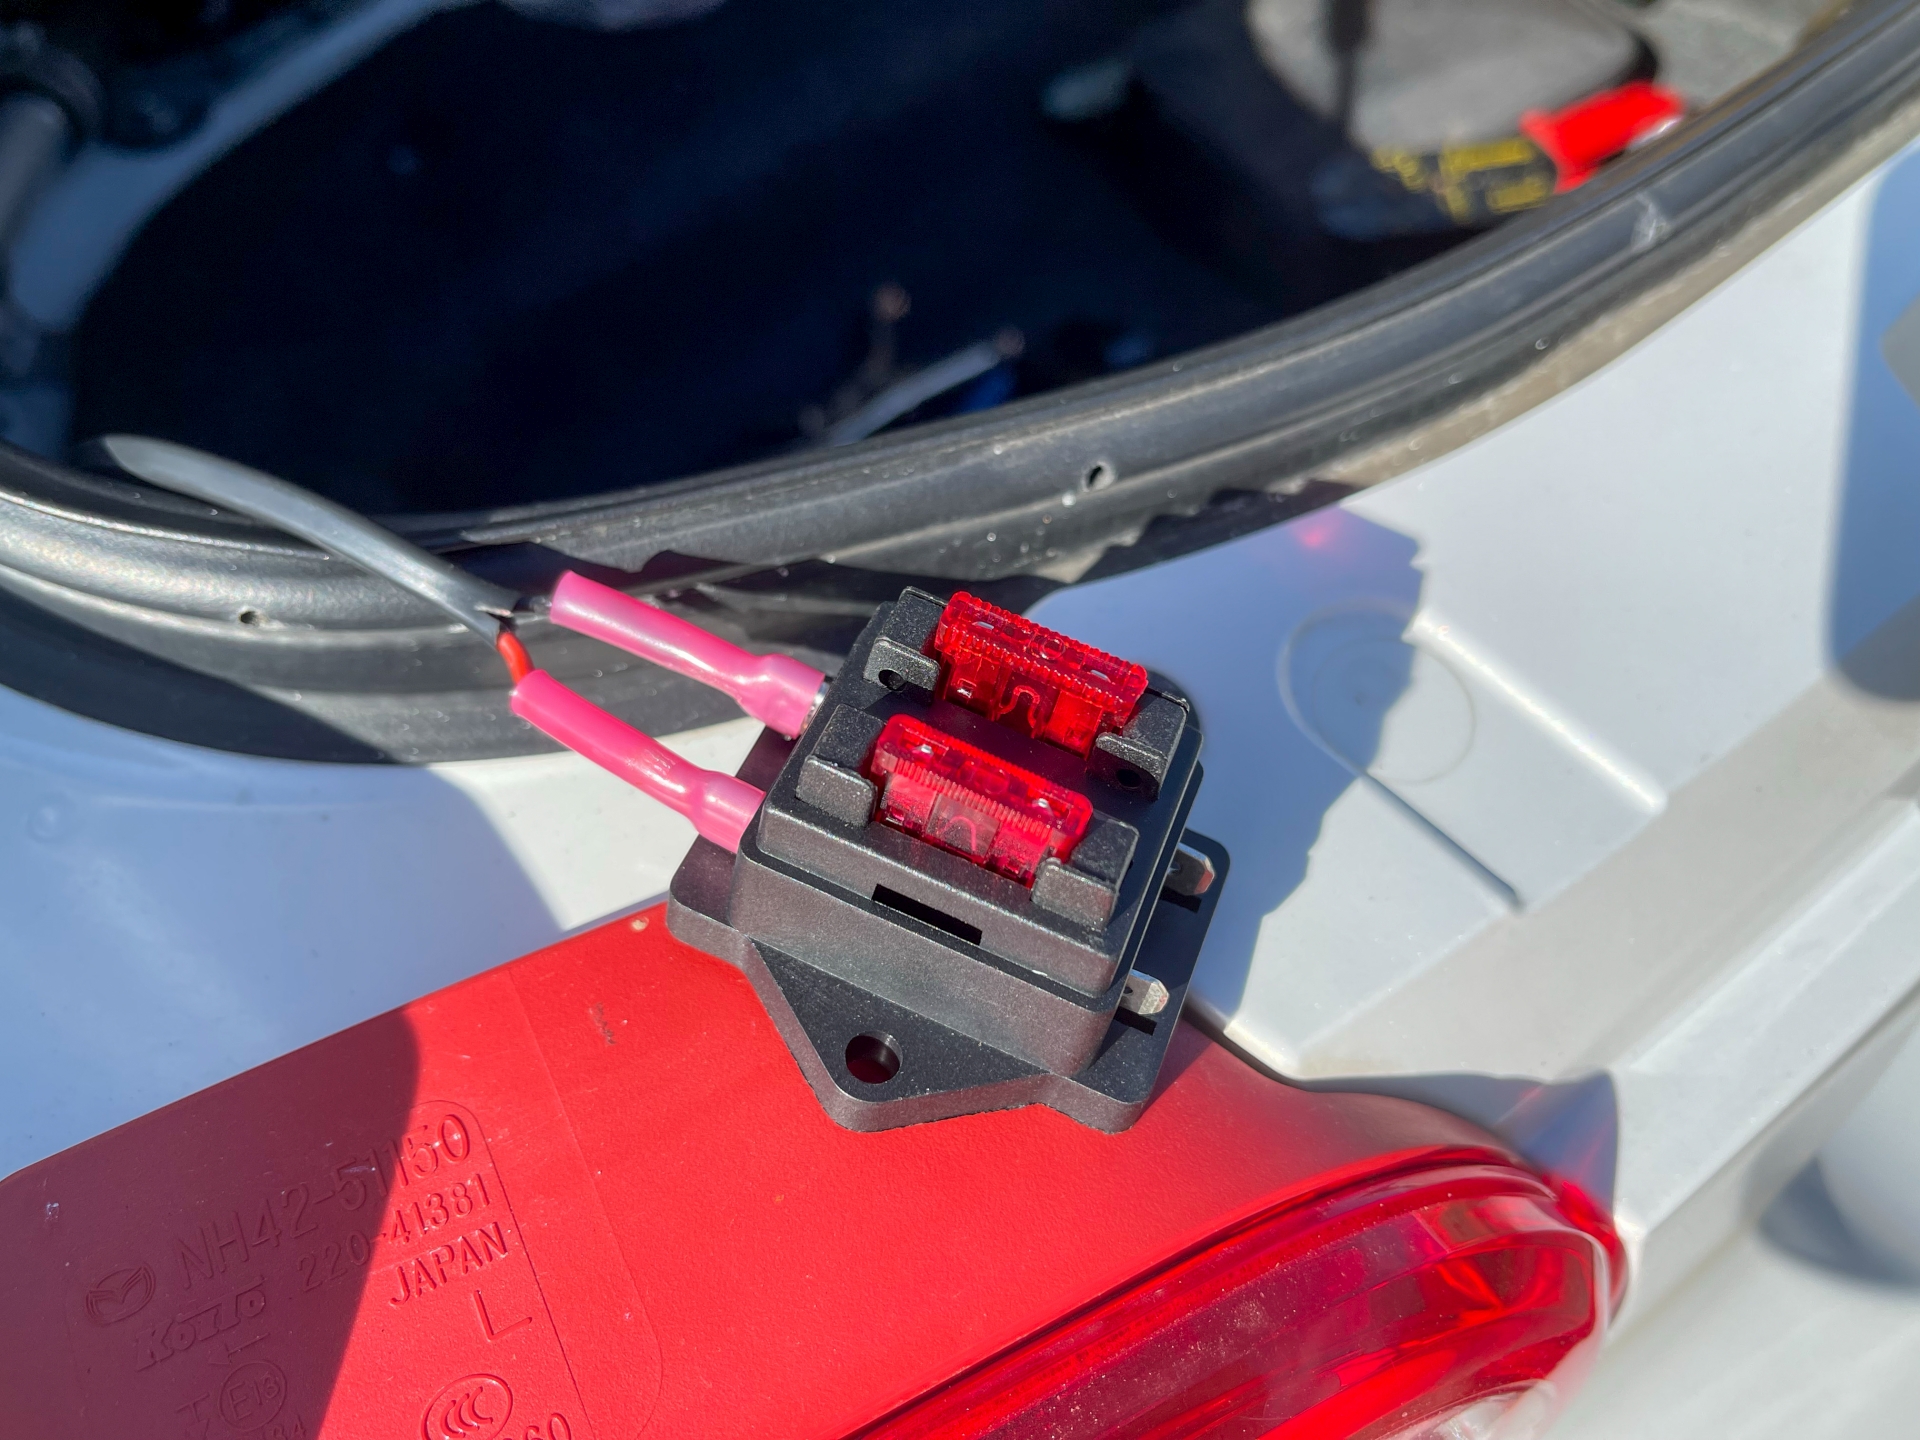
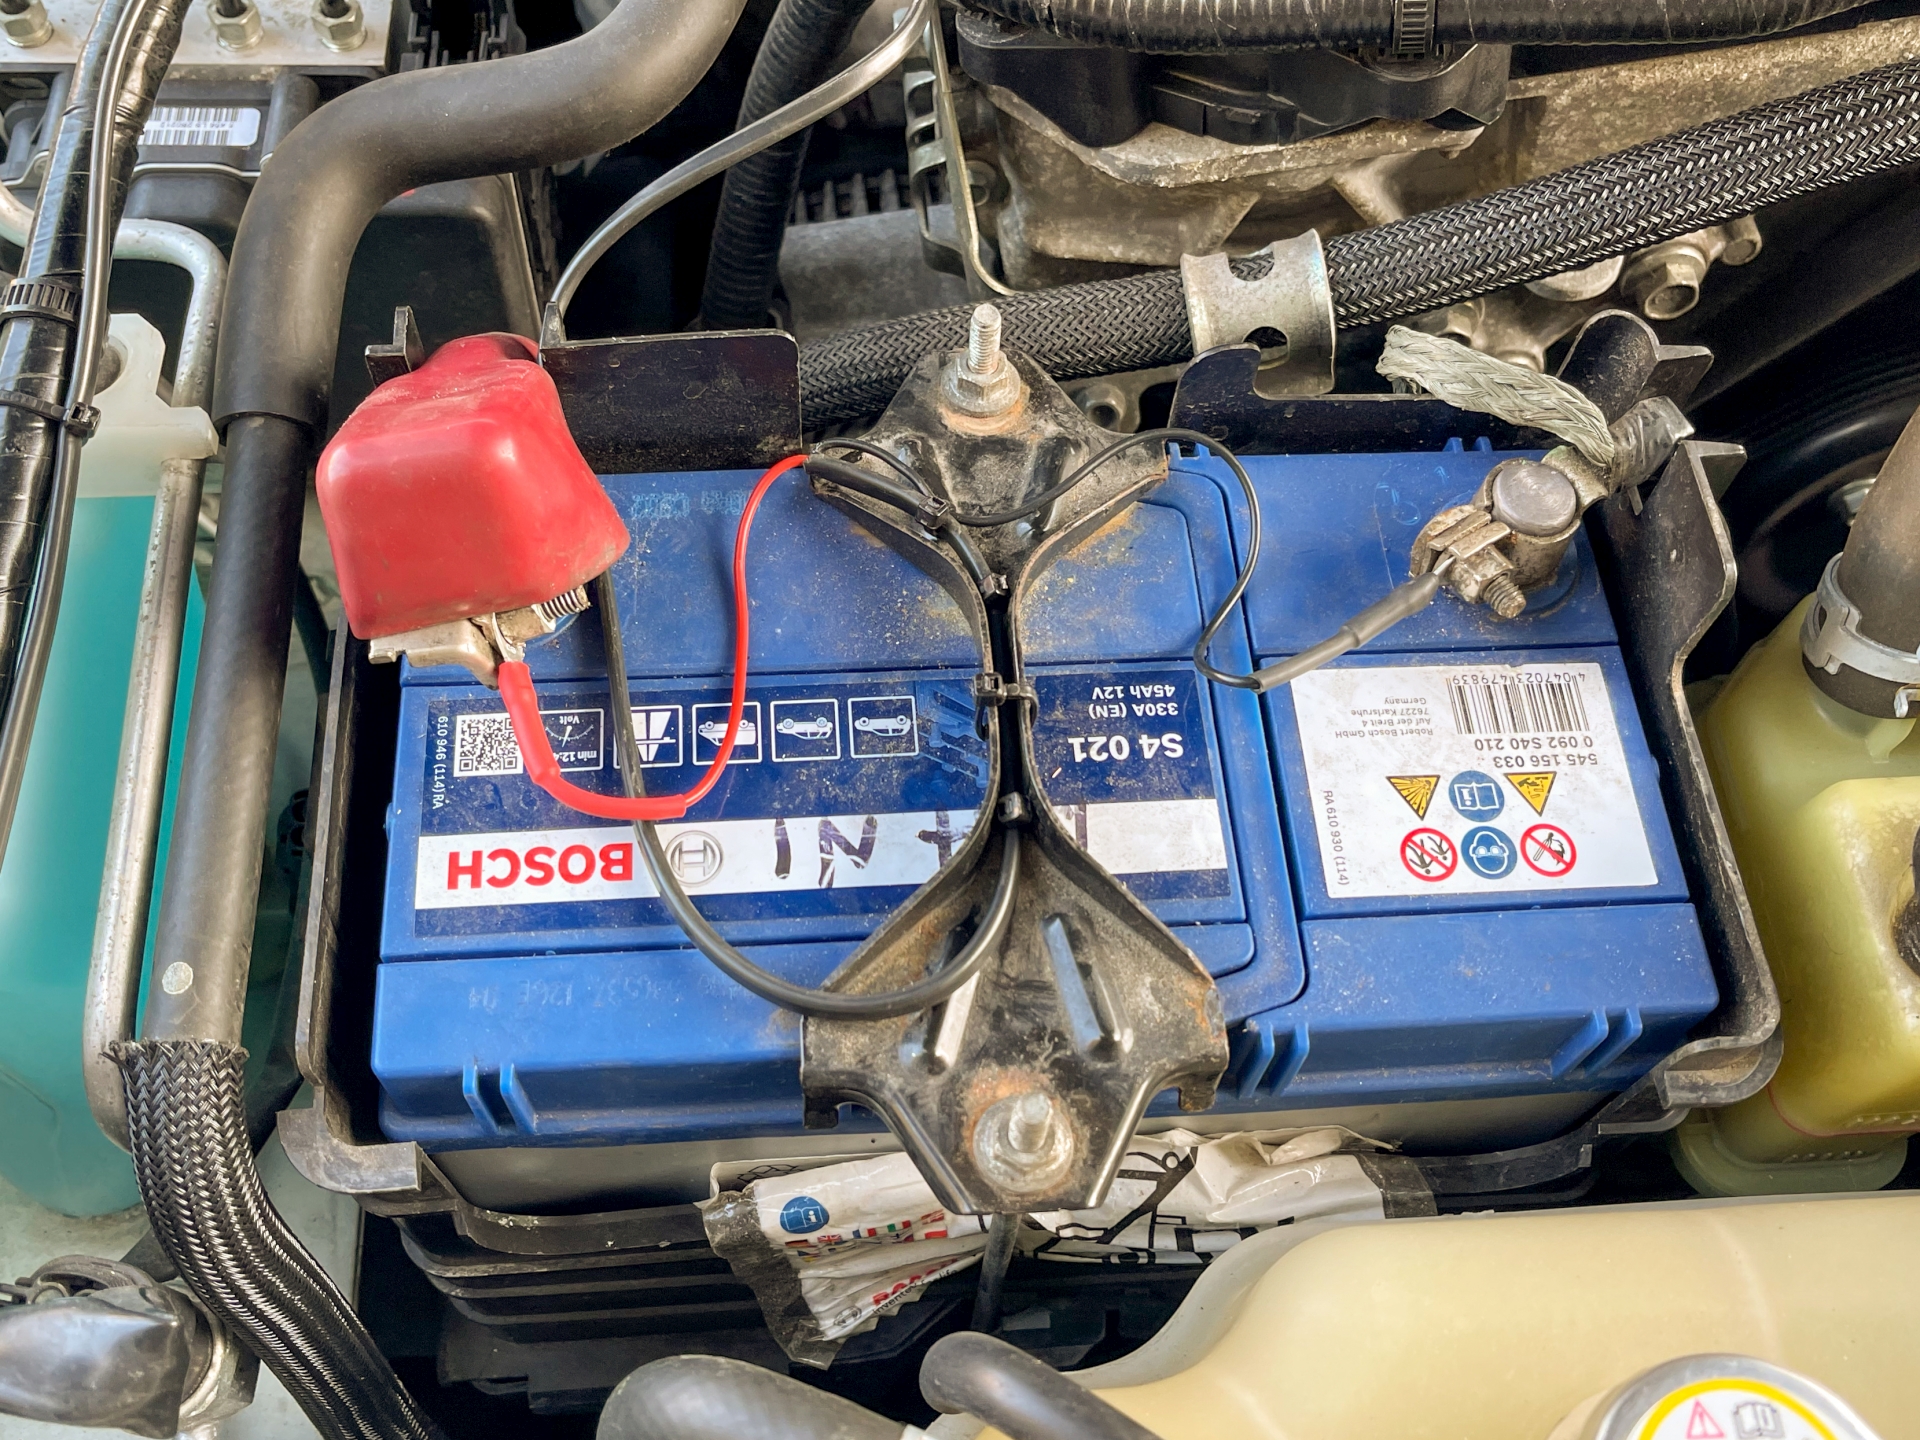
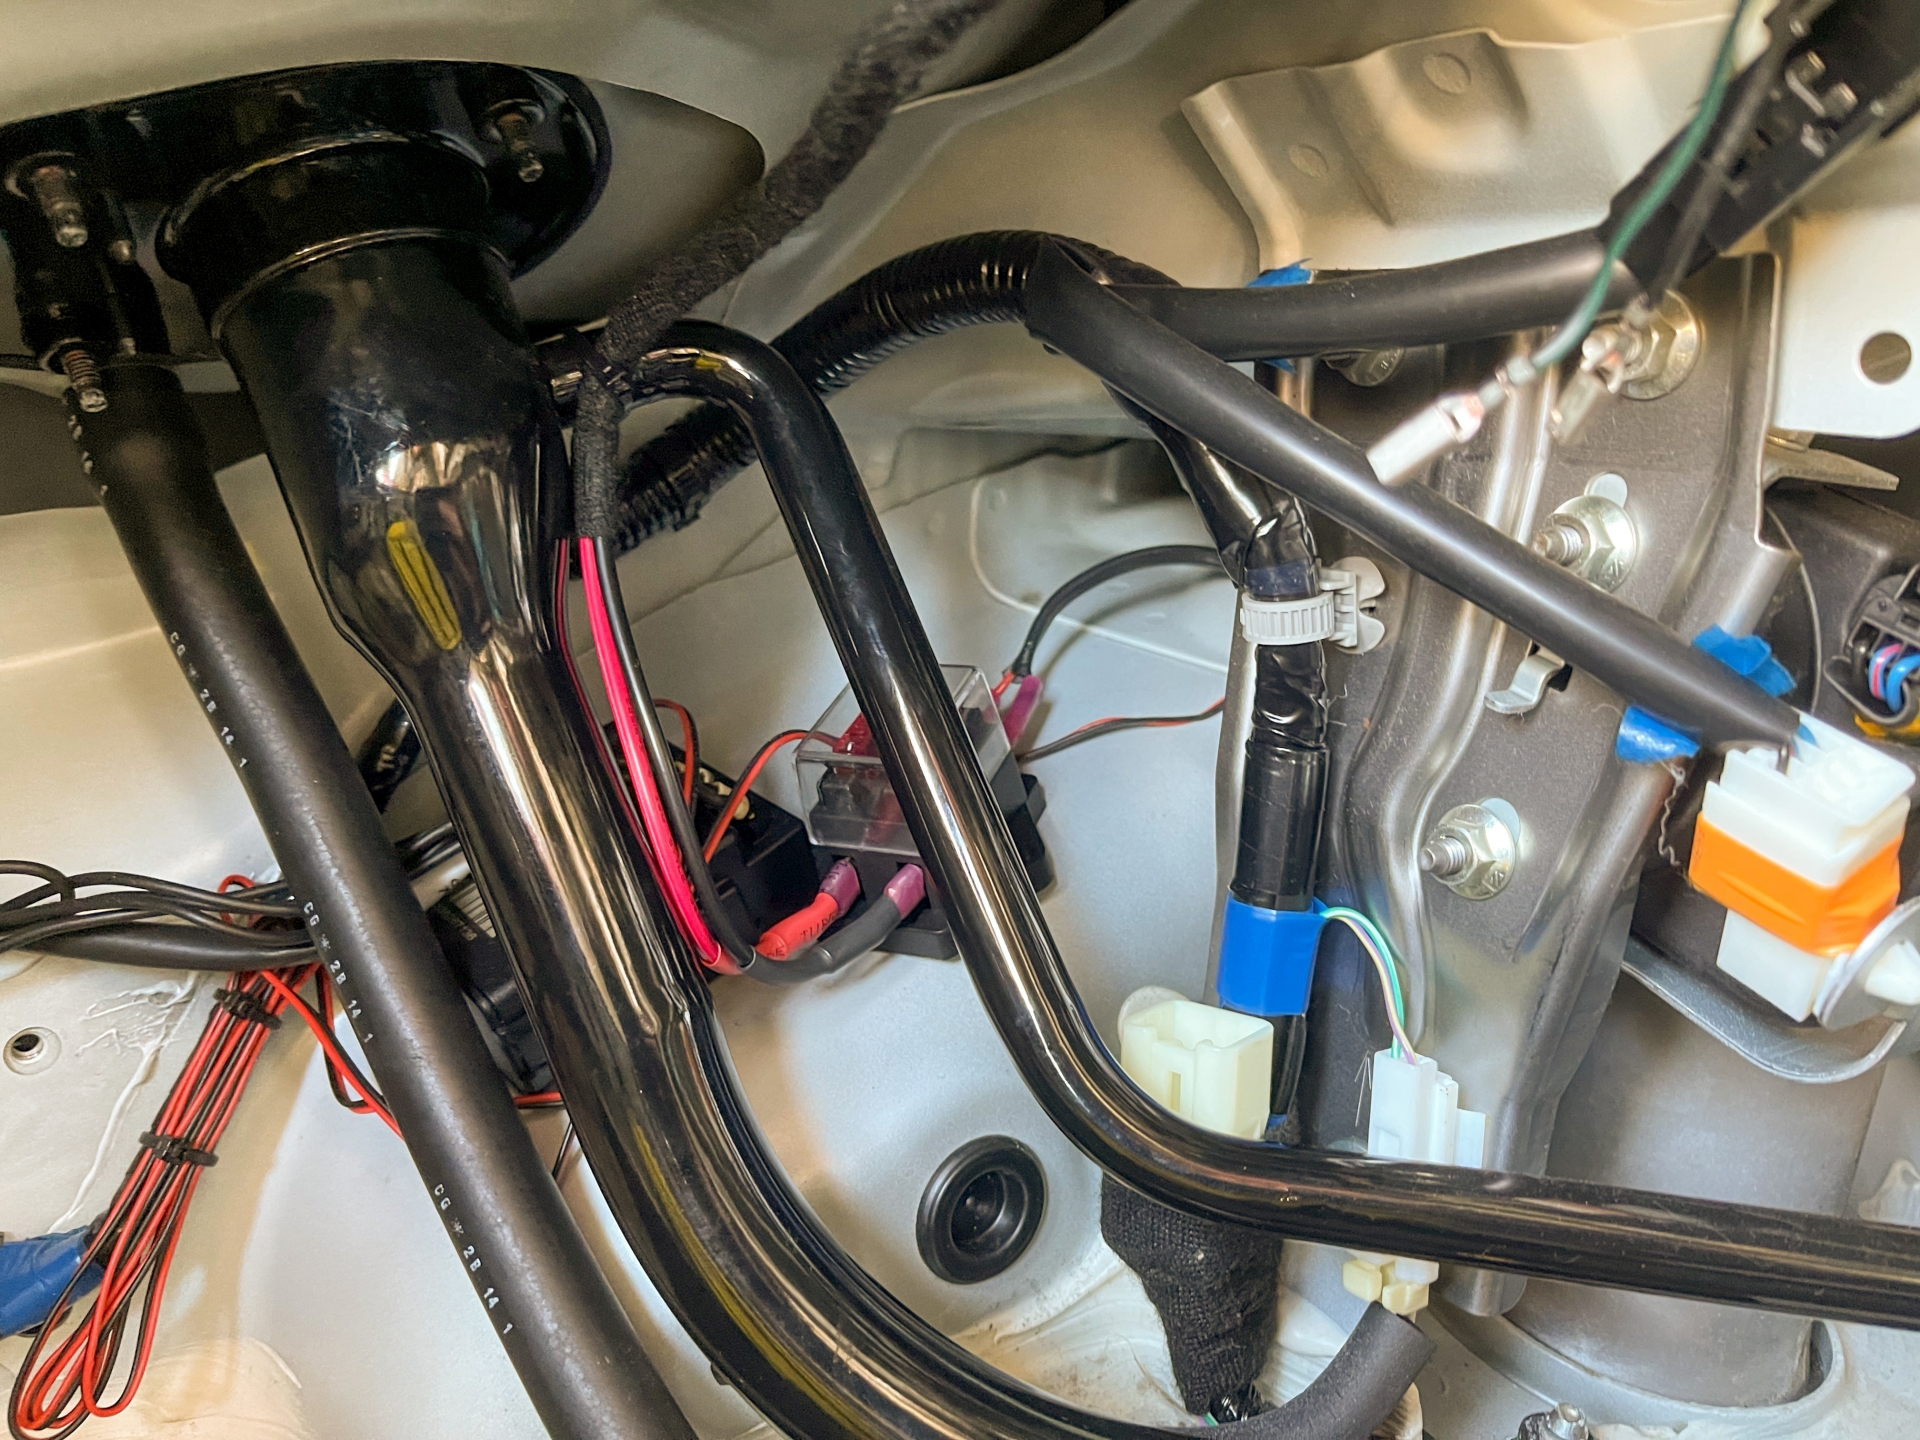
Anyway, the first job was to attach and install the fuse block so I could pull the cable to the front and know I had enough. This is a double fuse block I was using to add a fuse and to join the CTEK cable to the twin core cable I had purchased, rather than try and splice the cables I decided to just put two fuses in and use the block for positive and negative. Not the normal way of doing it but fine as far as I can see. The block is stuck down with VHB tape in the best place I could find, I can just about reach it to change the fuse(s).
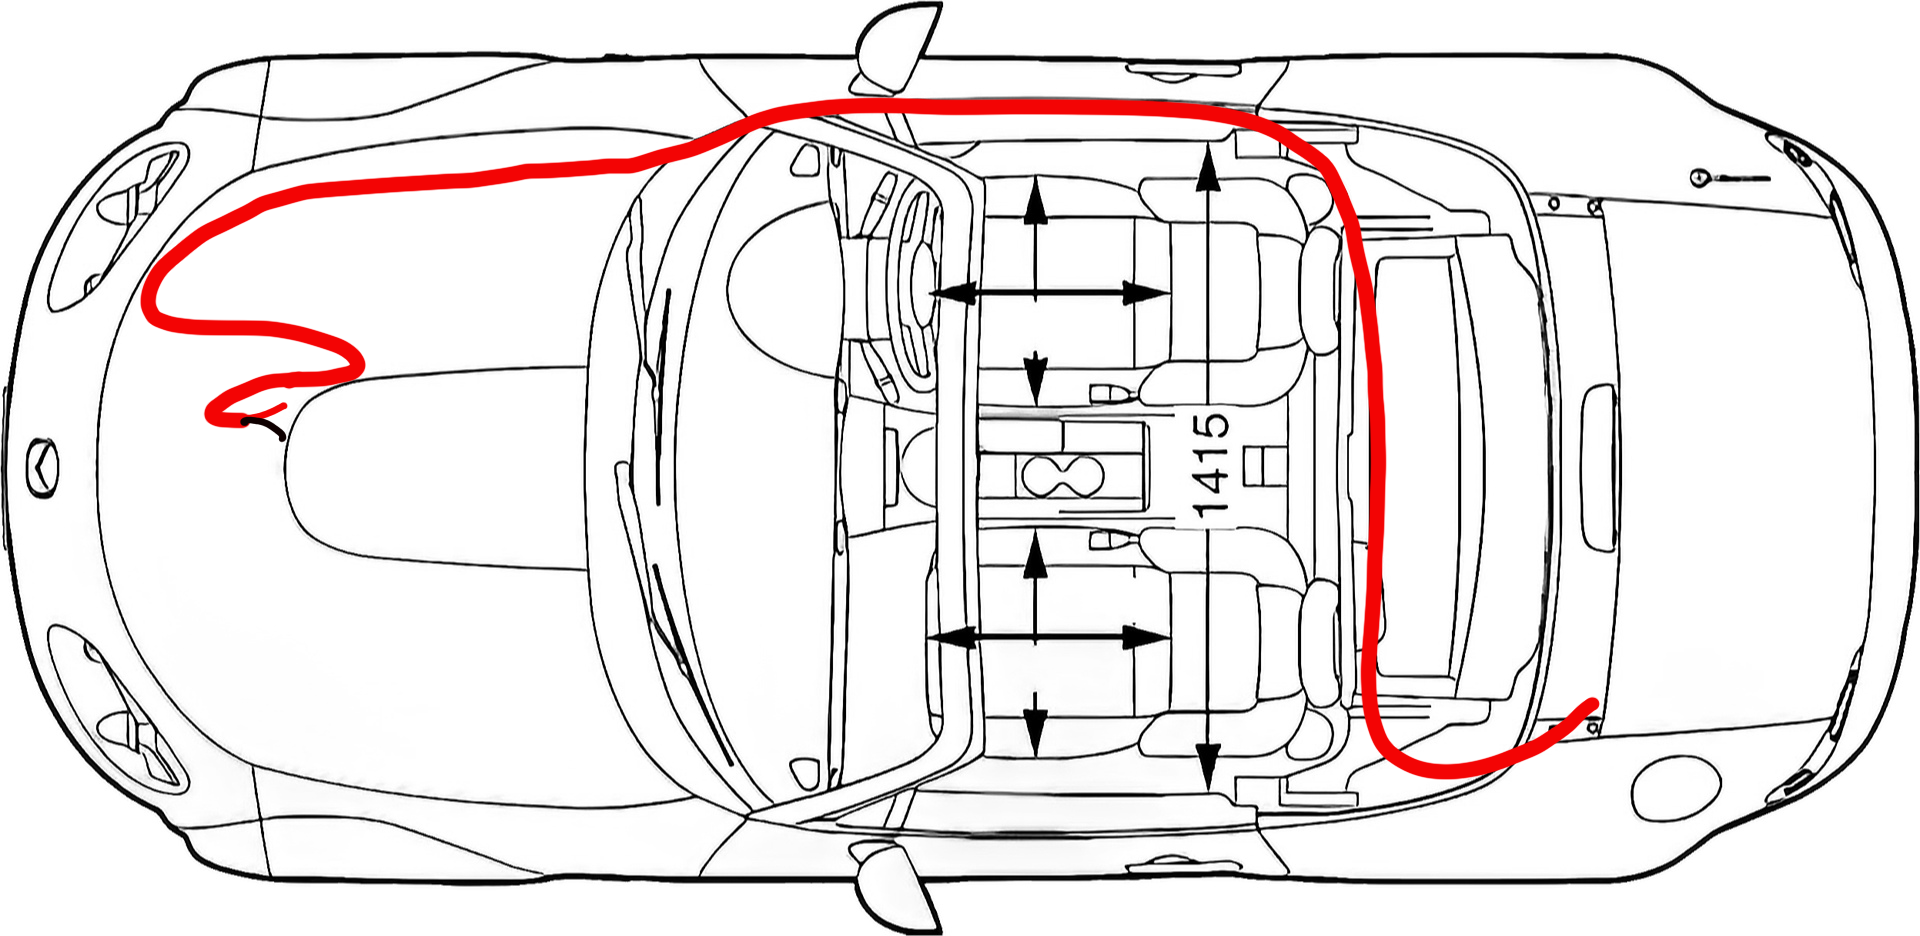
I ran the cable behind the roof 'tray', along in front of it and then along the right-hand sill. It then disappears through the same grommet as the bonnet release, snakes around the engine bay before splitting for connection to the battery.
Here's a sequence of photos of cable ties where I ran the cable. I won't include them all as it would bore you stupid. I looked back through all of my photos and counted 32 cable ties.
|
|
 |
 |
 |
 |
 |
 |
 |
 |
I then attached the ring terminals (heat shrink crimp type, got to use my new Ryobi heat gun) and added some more ties to stop the cable from moving.
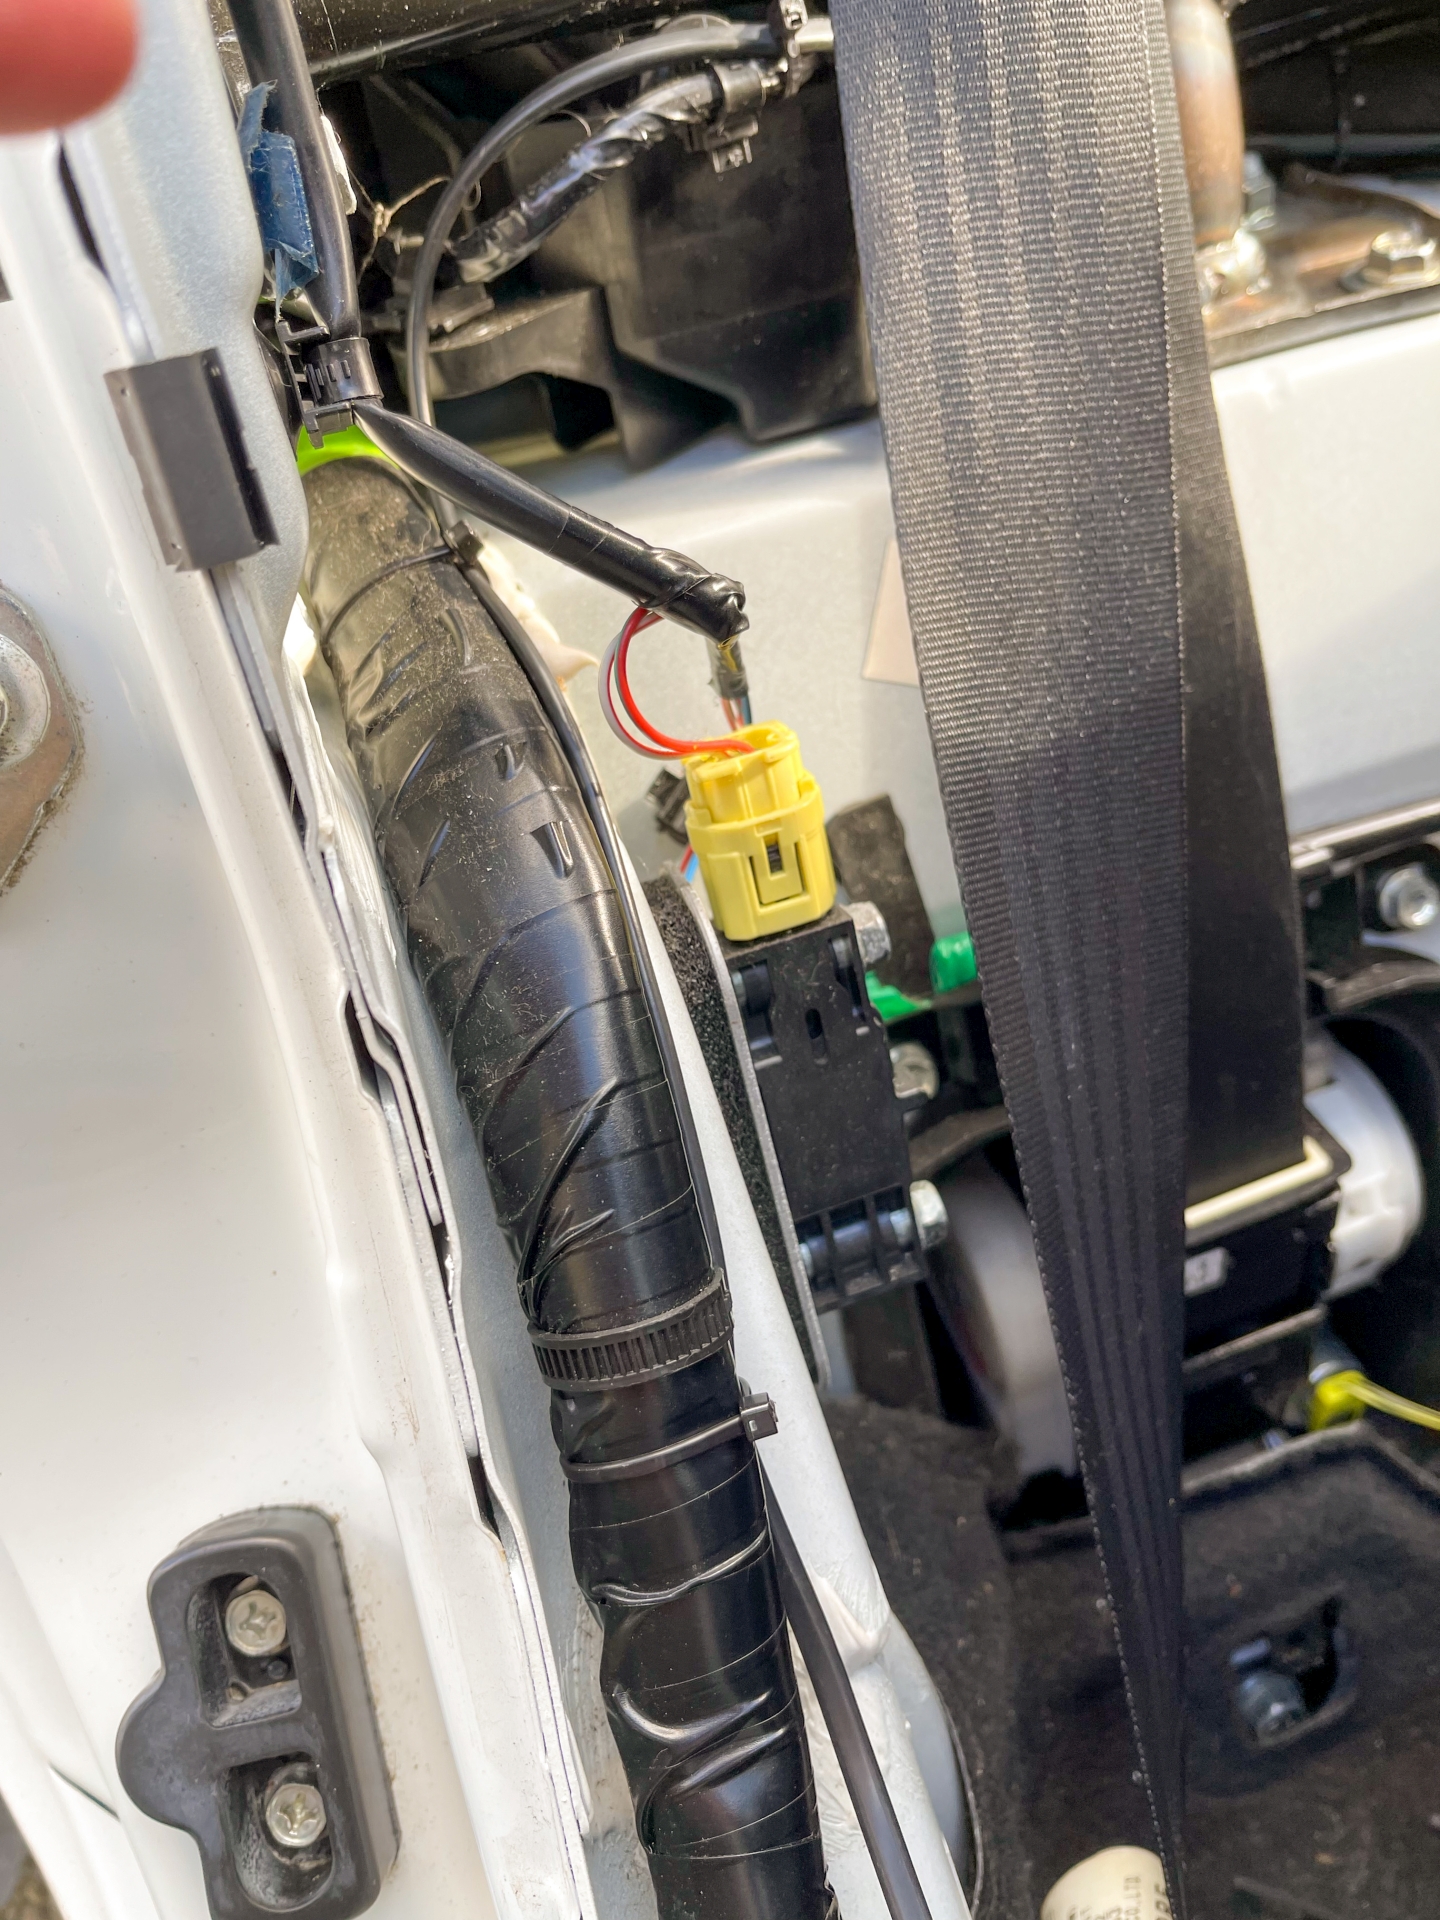
I wrapped the CTEK cable in fabric tape to protect it and so it looked OEM.

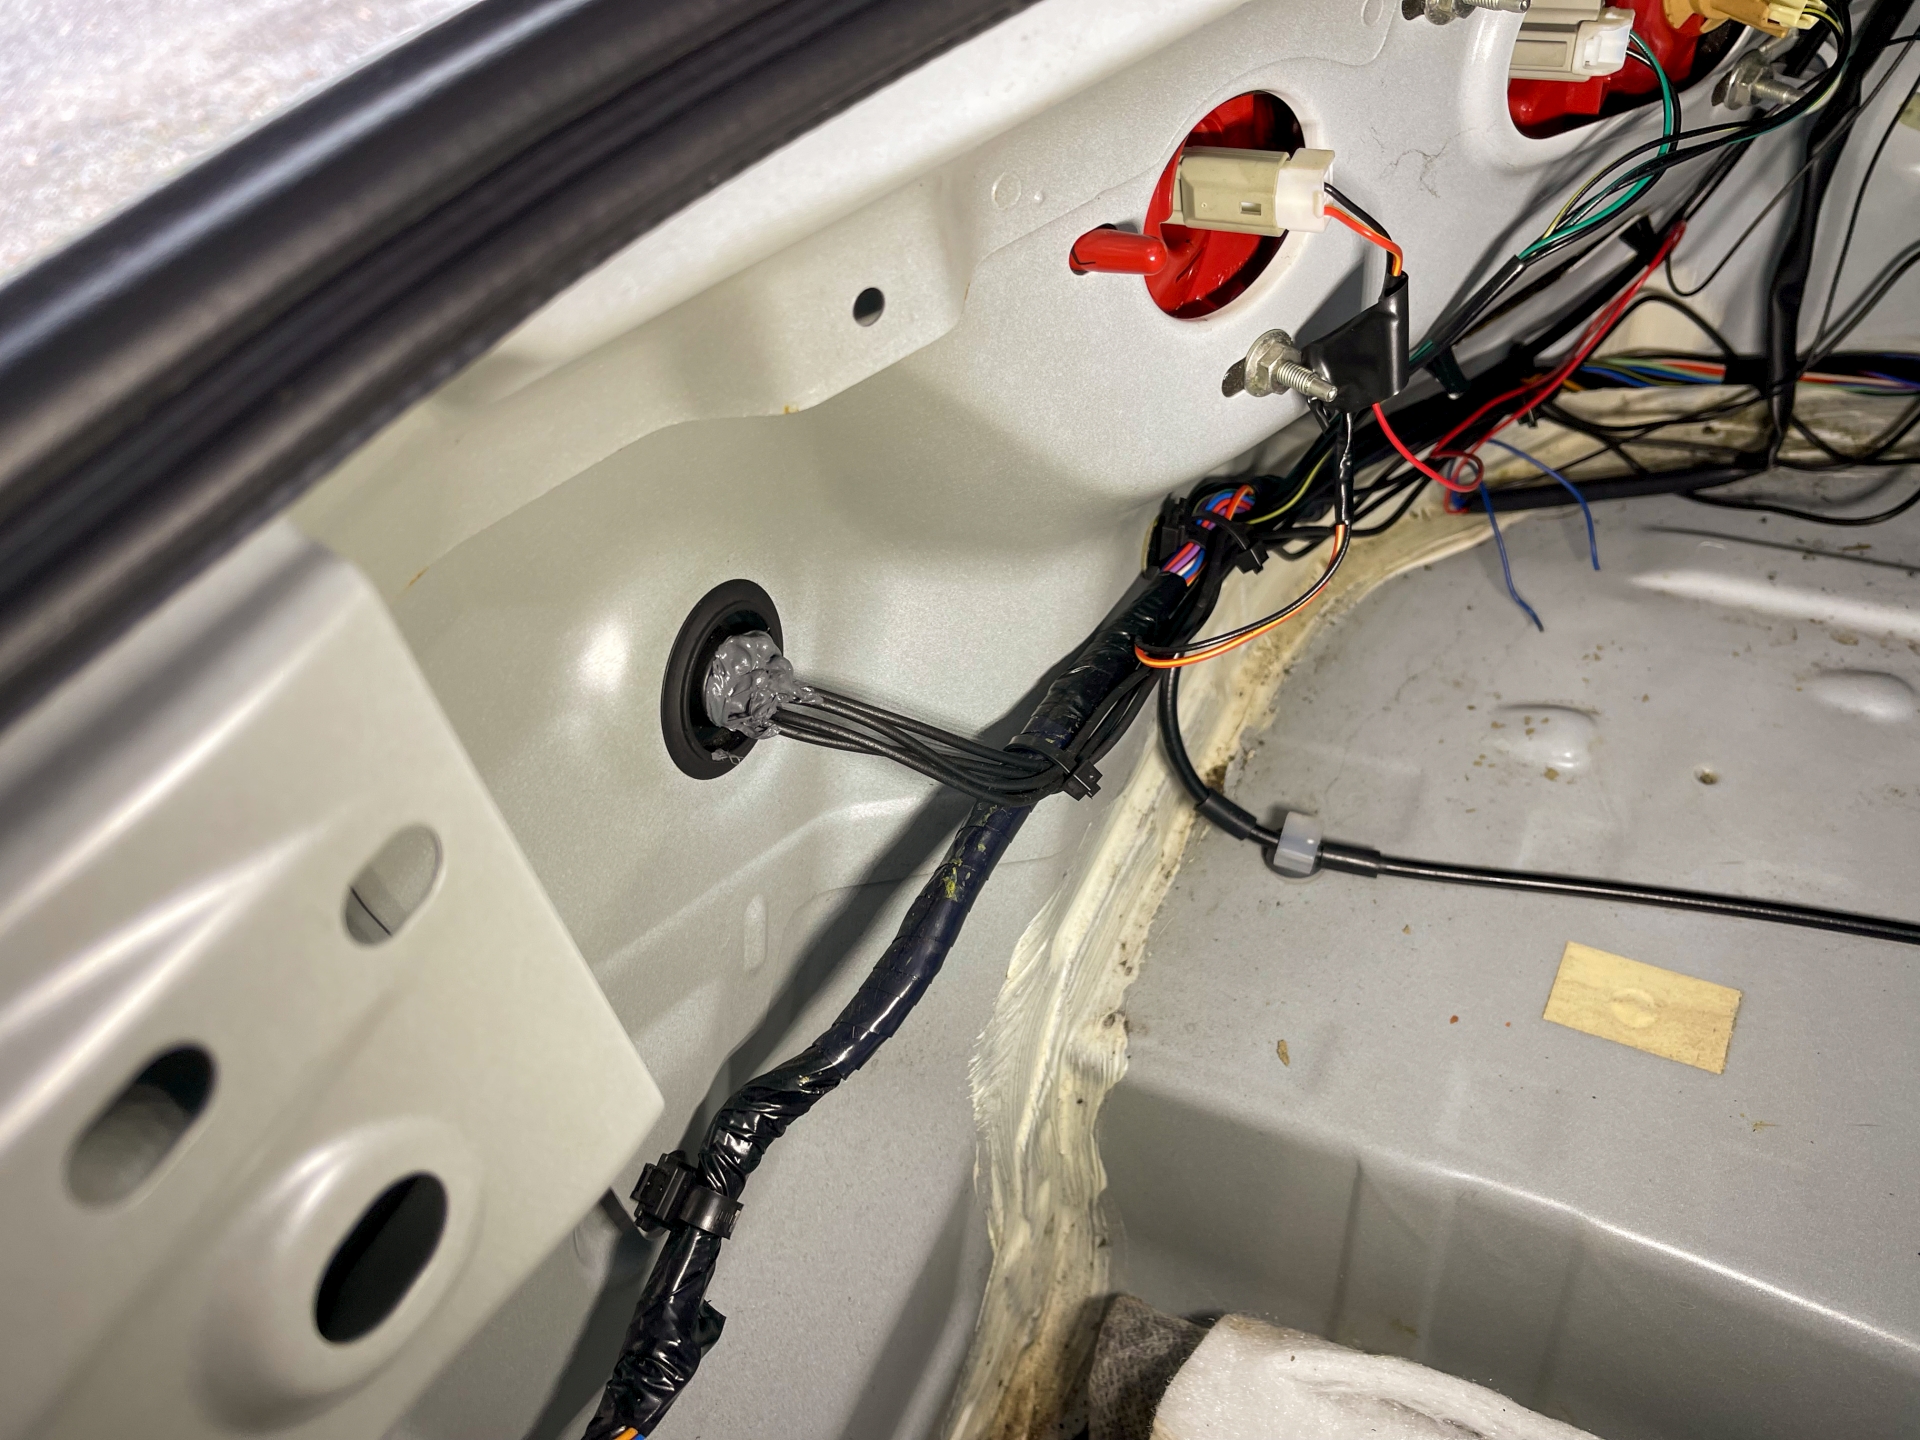
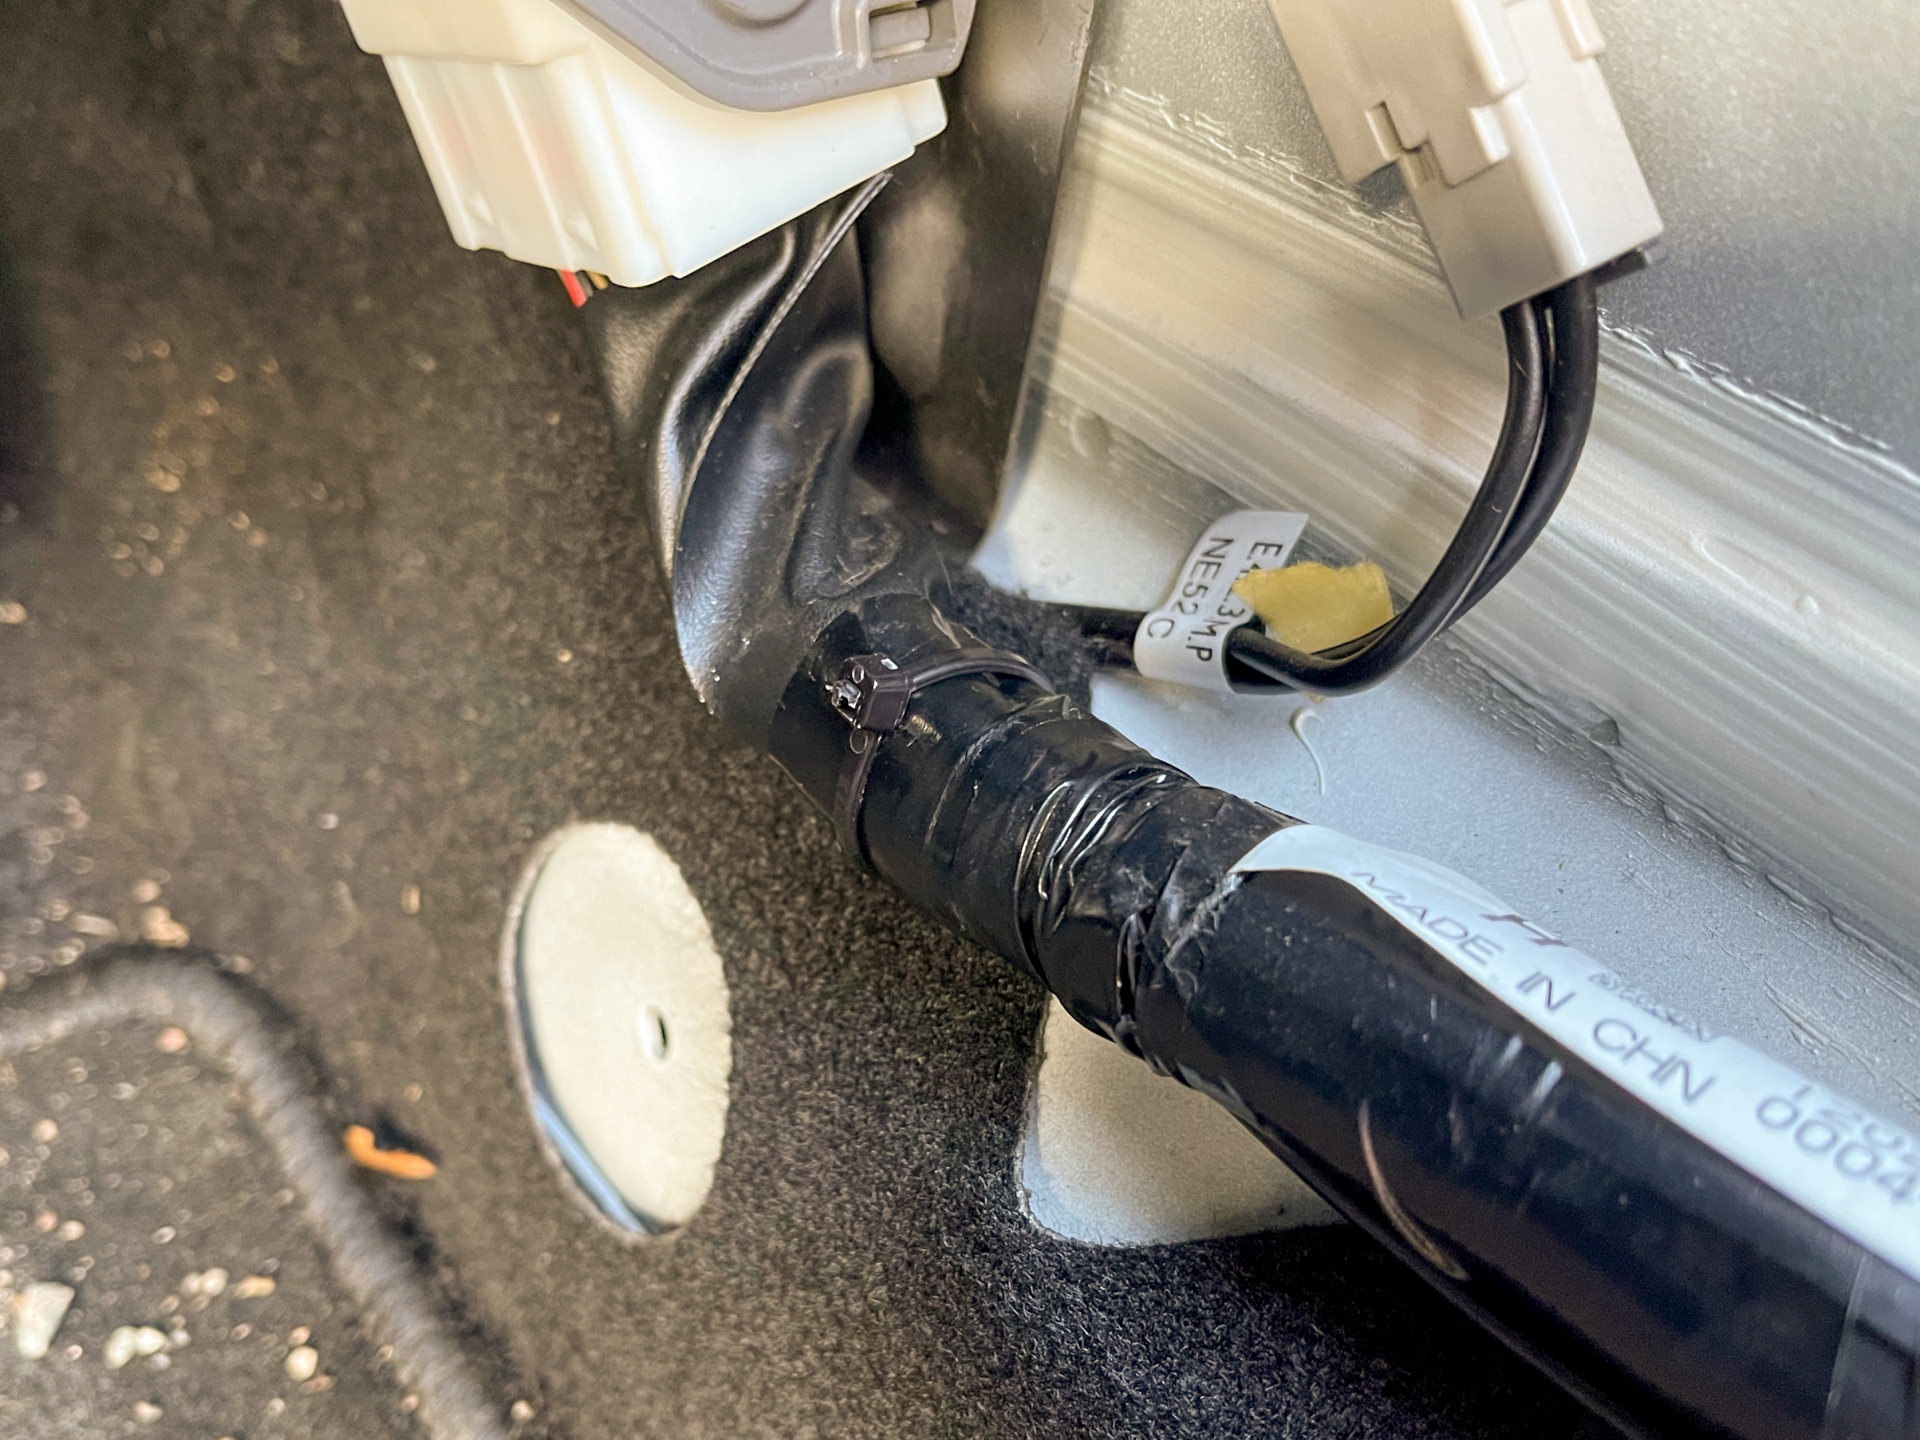
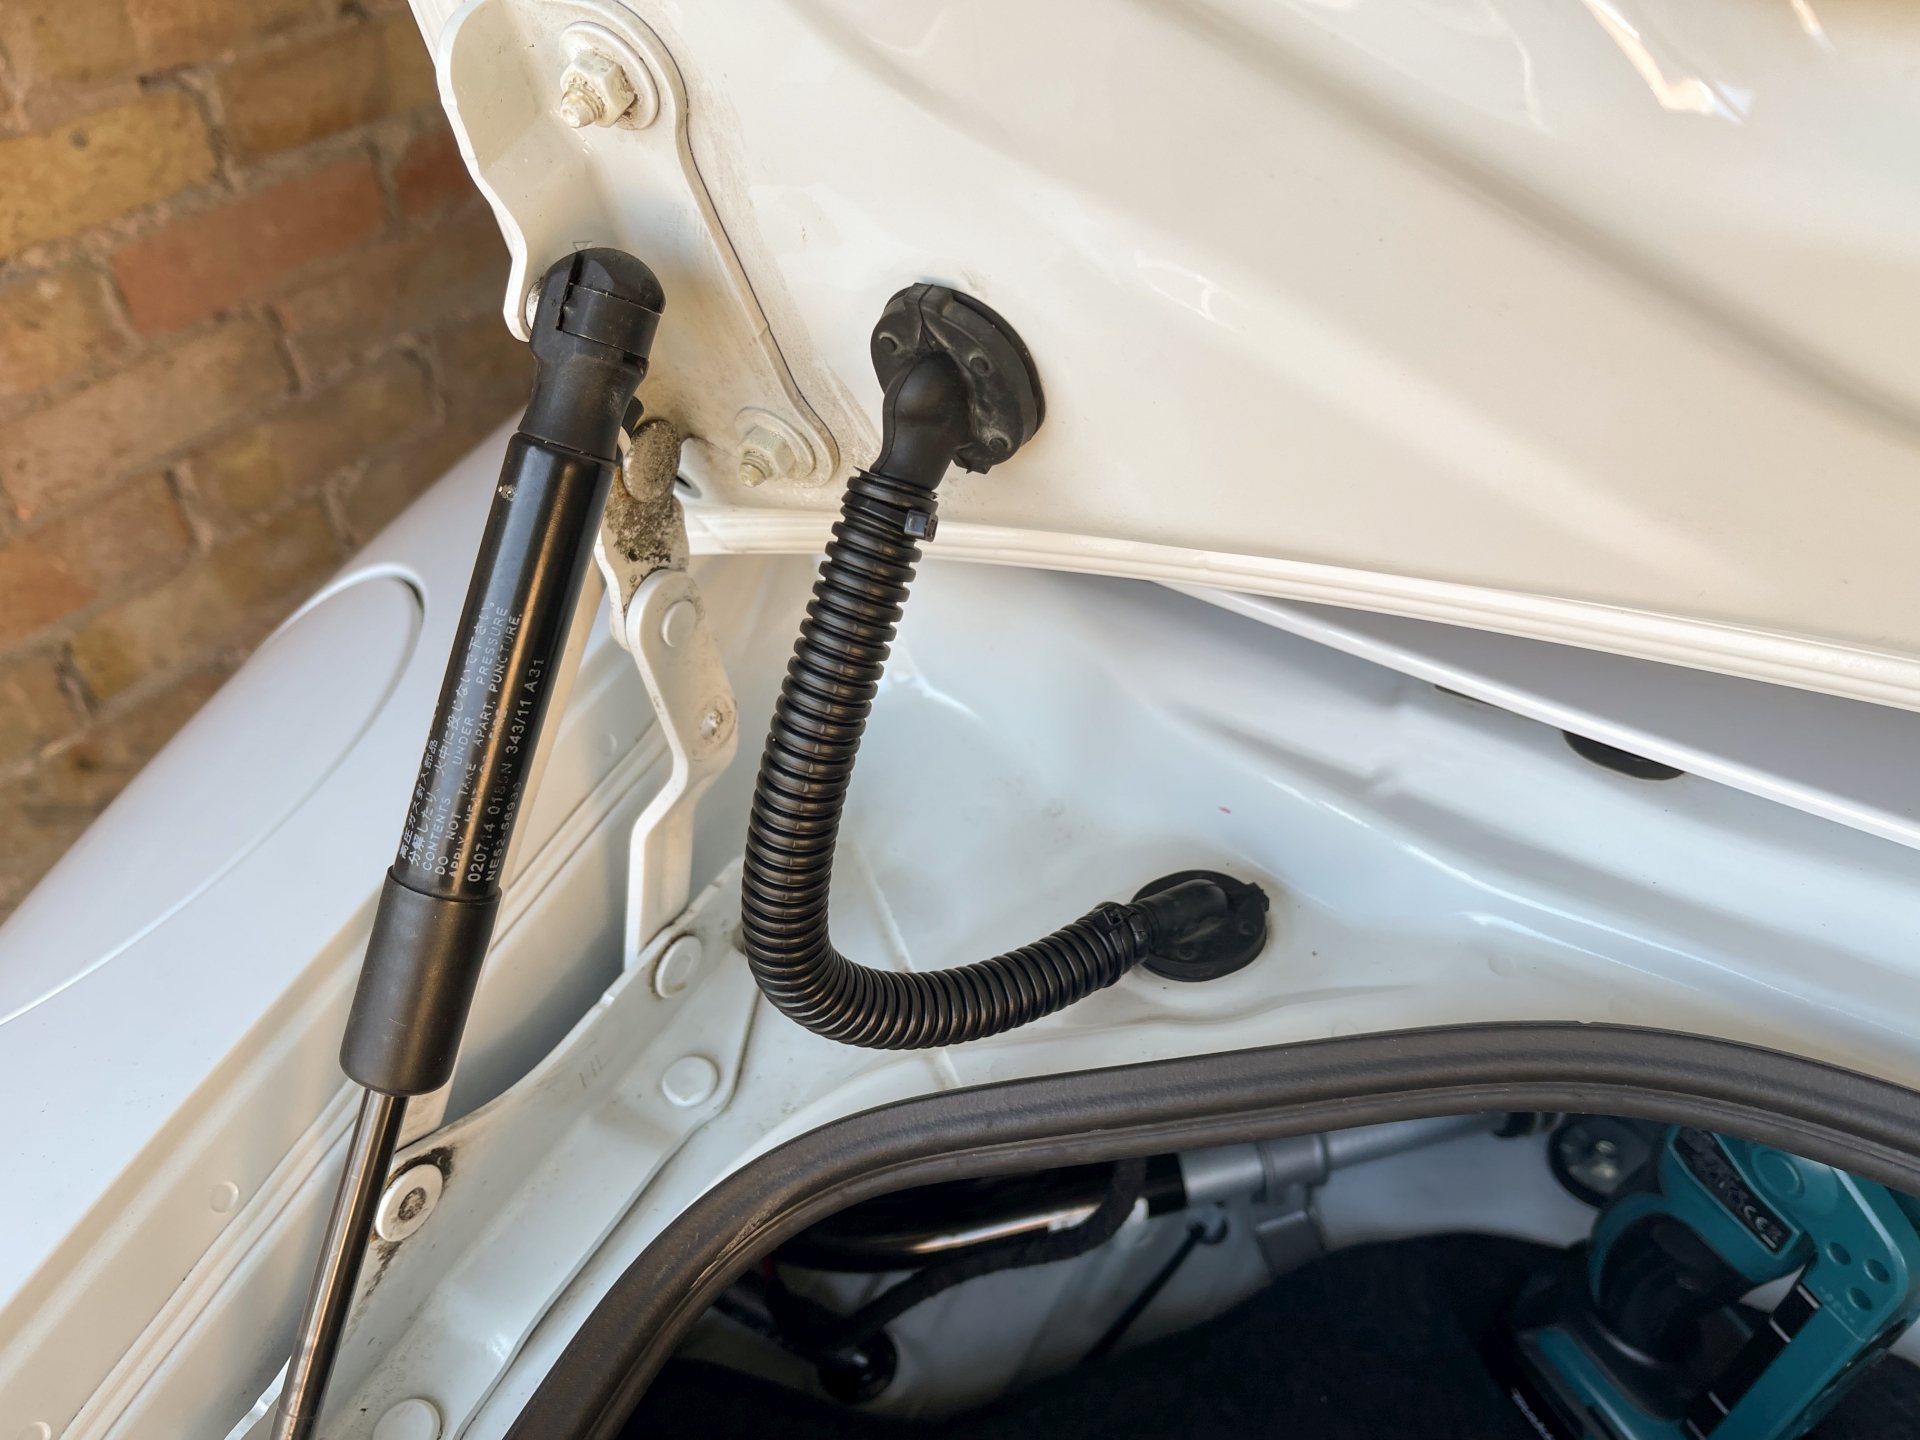
The cable was fed through the panel, through the panel clip thingies and the larger conduit tube I had to buy. I had to pull out the two cables/connectors for the plate lights and feed those back through, fiddly little things with relatively big connectors.
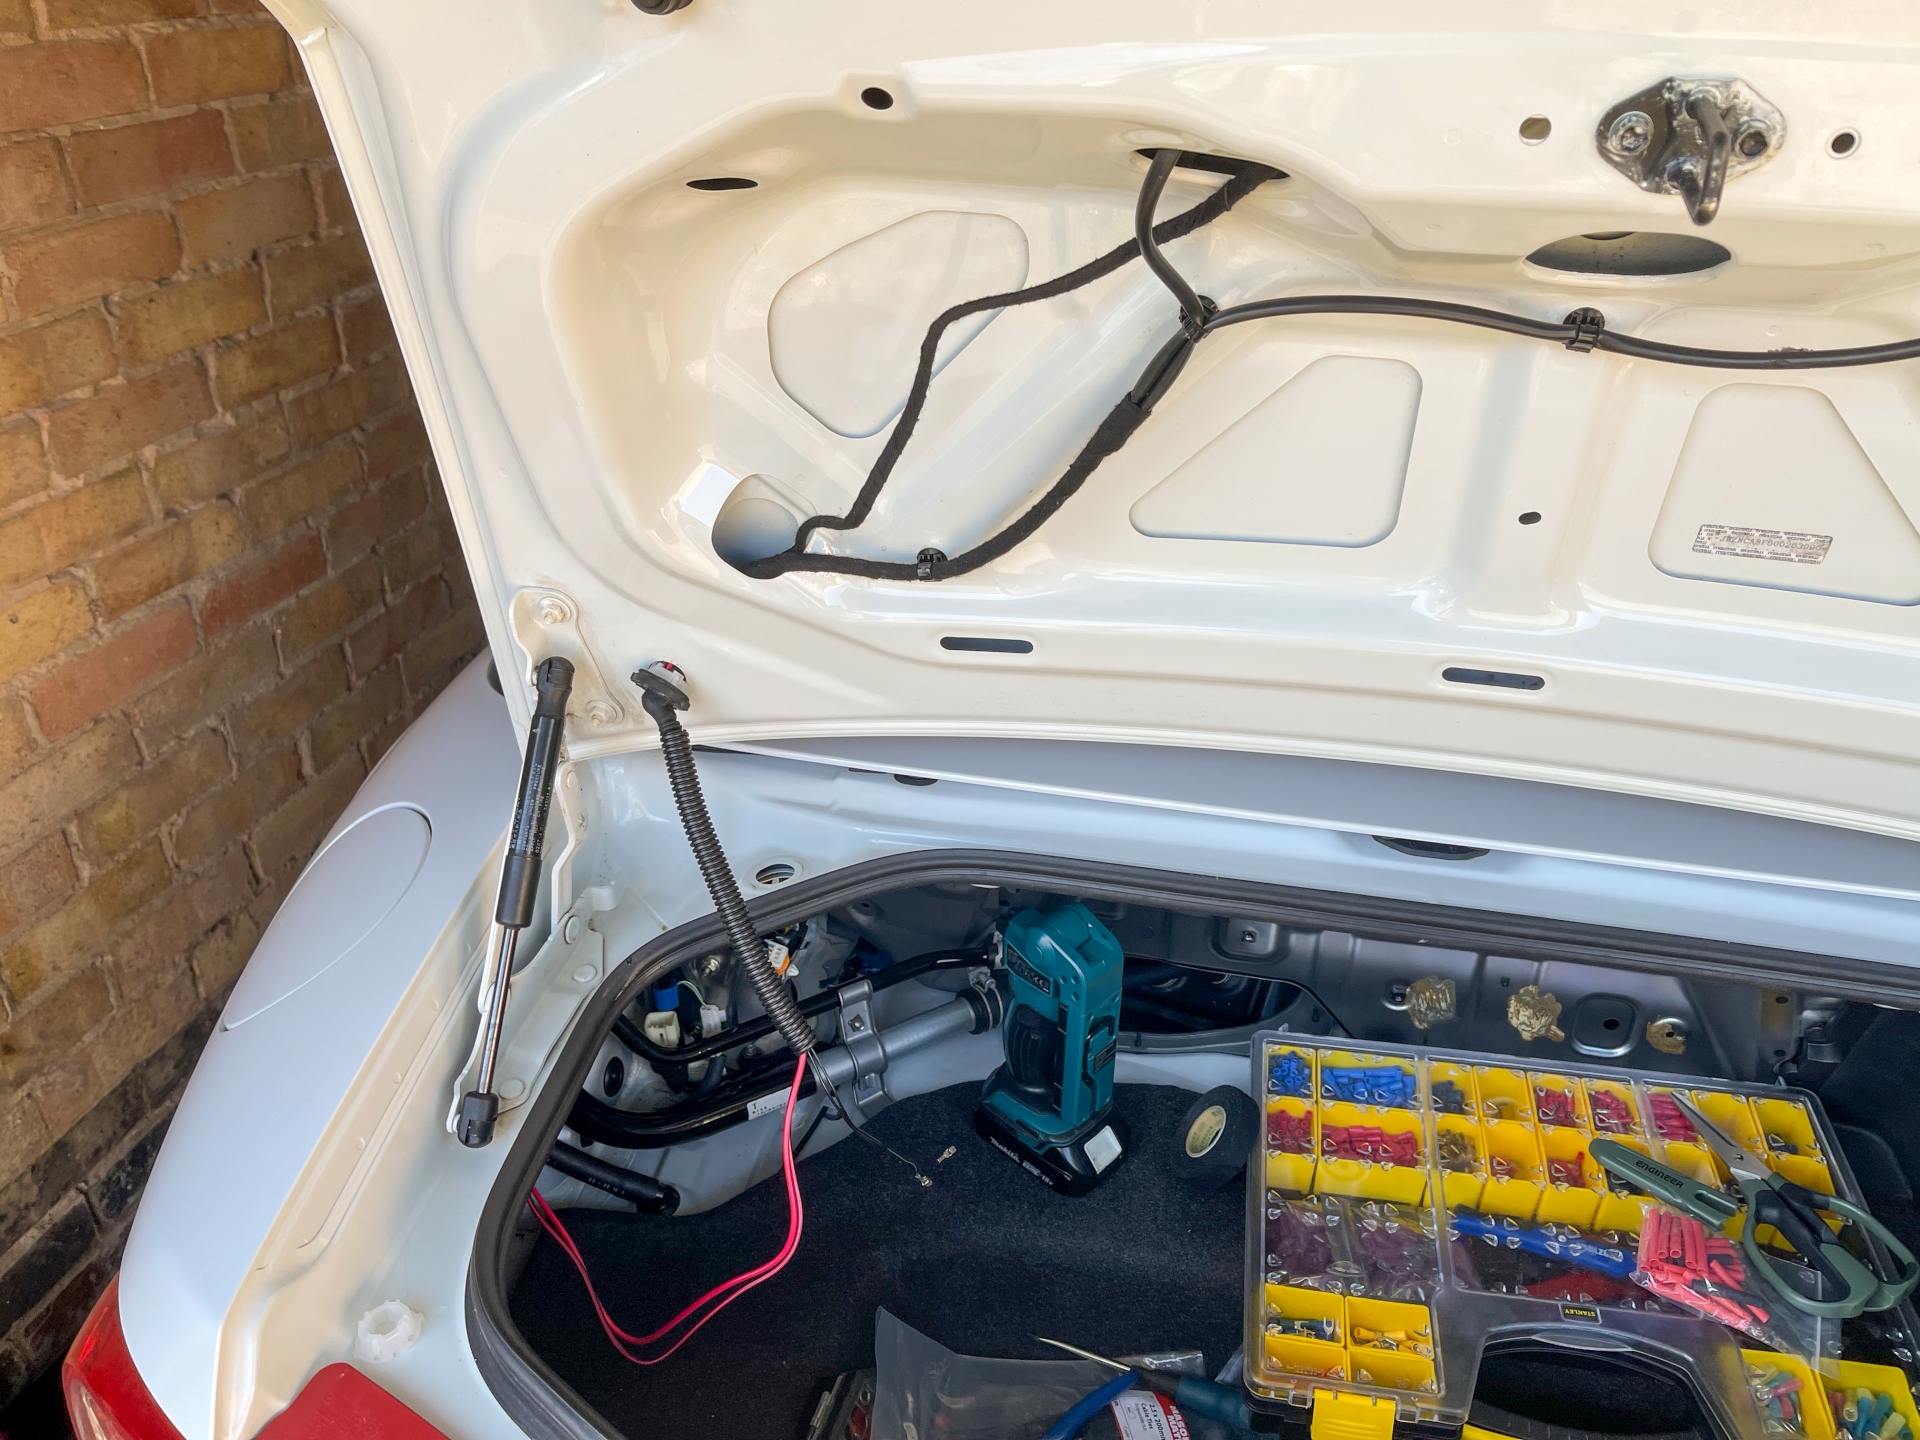
This was also wrapped where it exited the conduit and then fed inside.
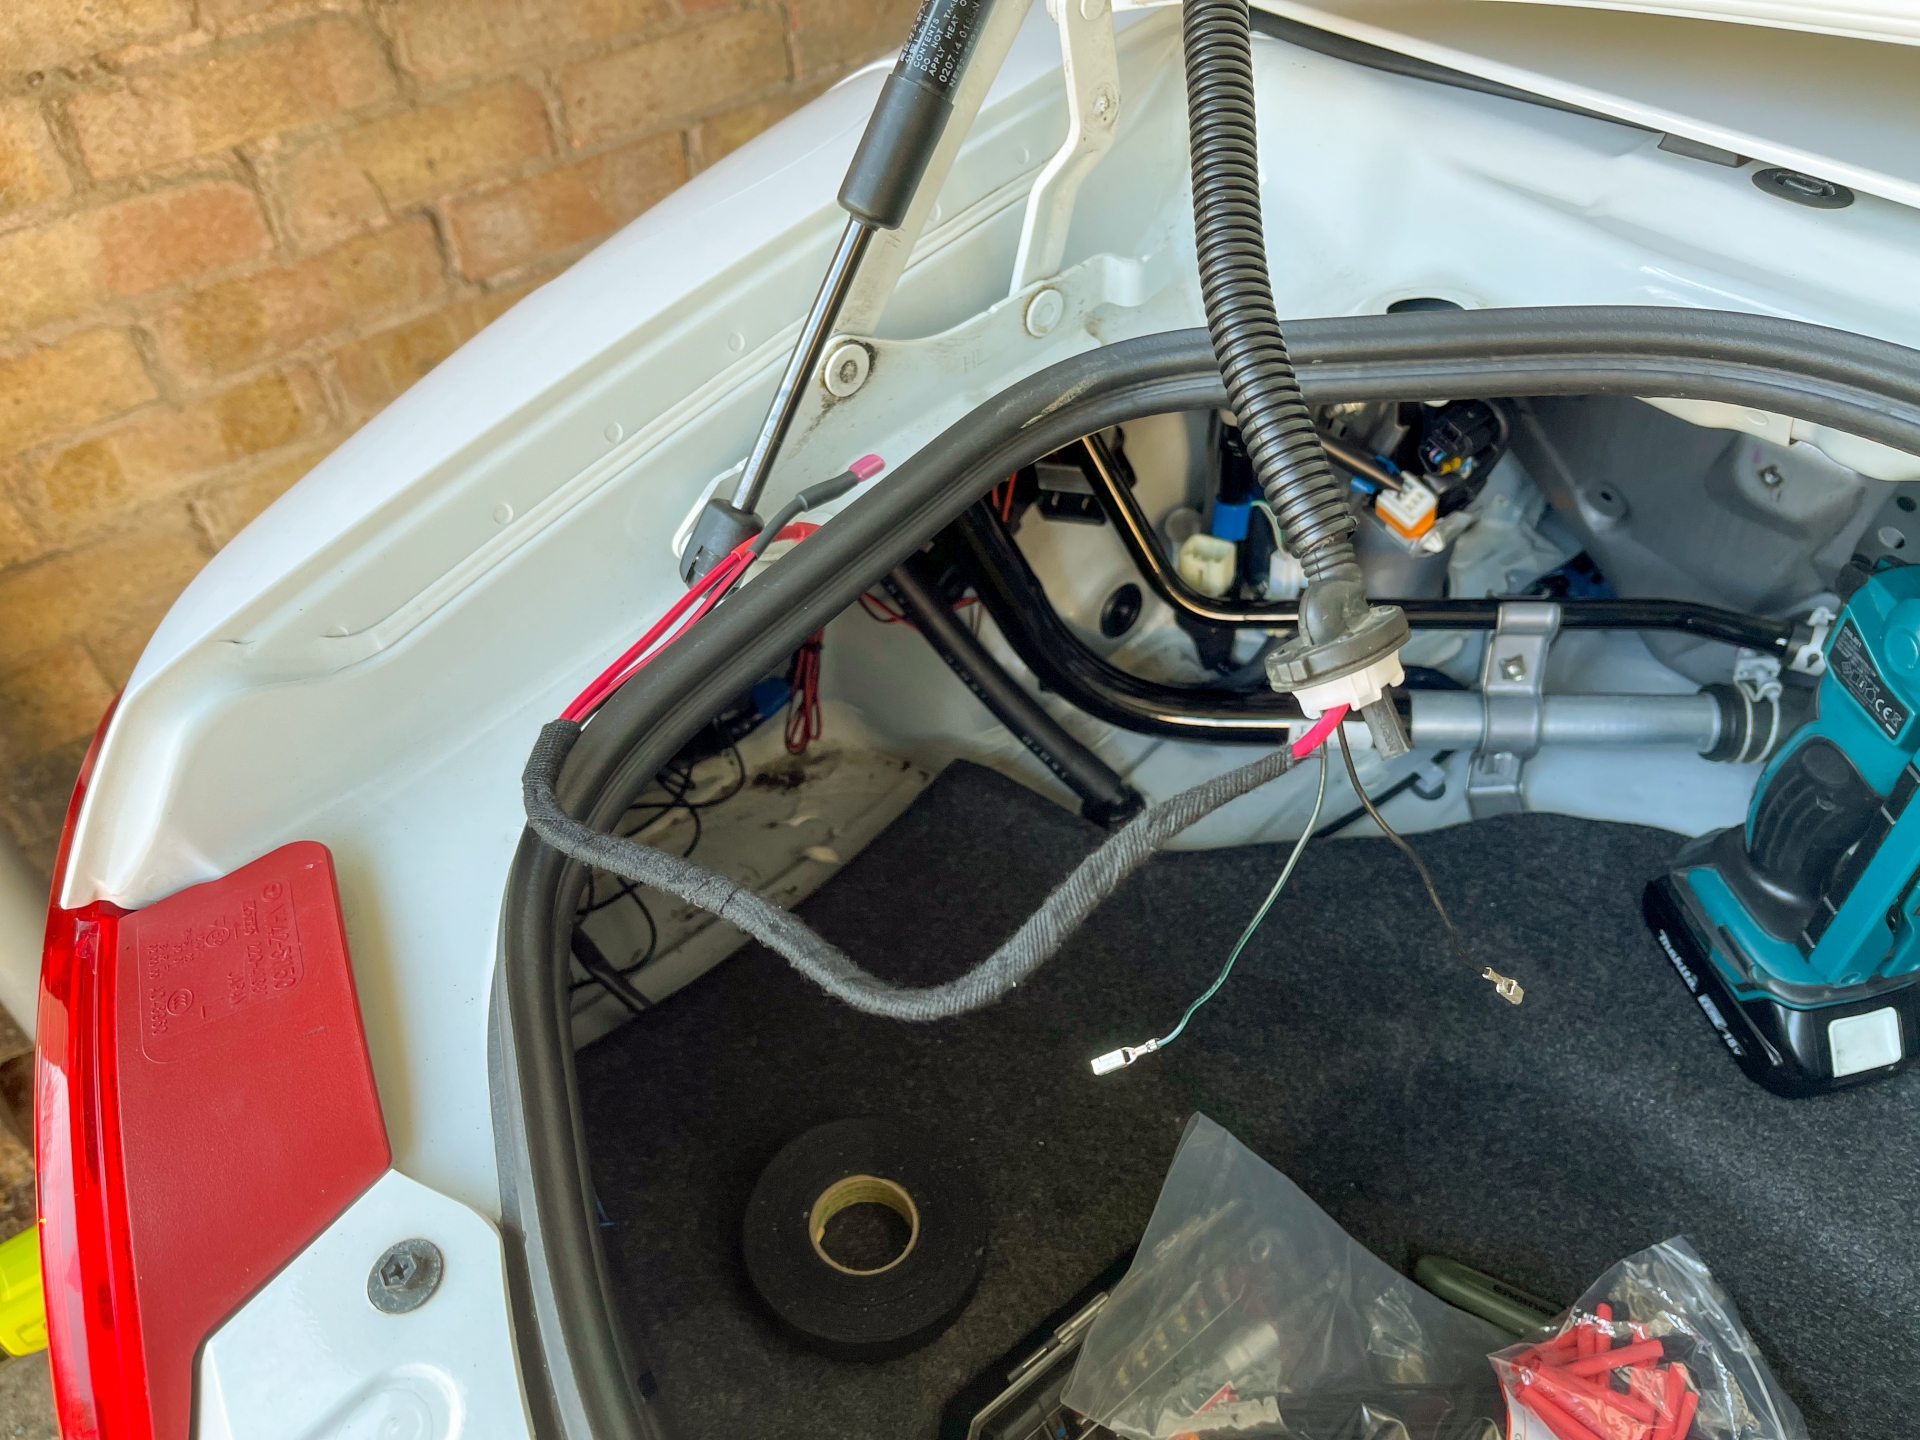
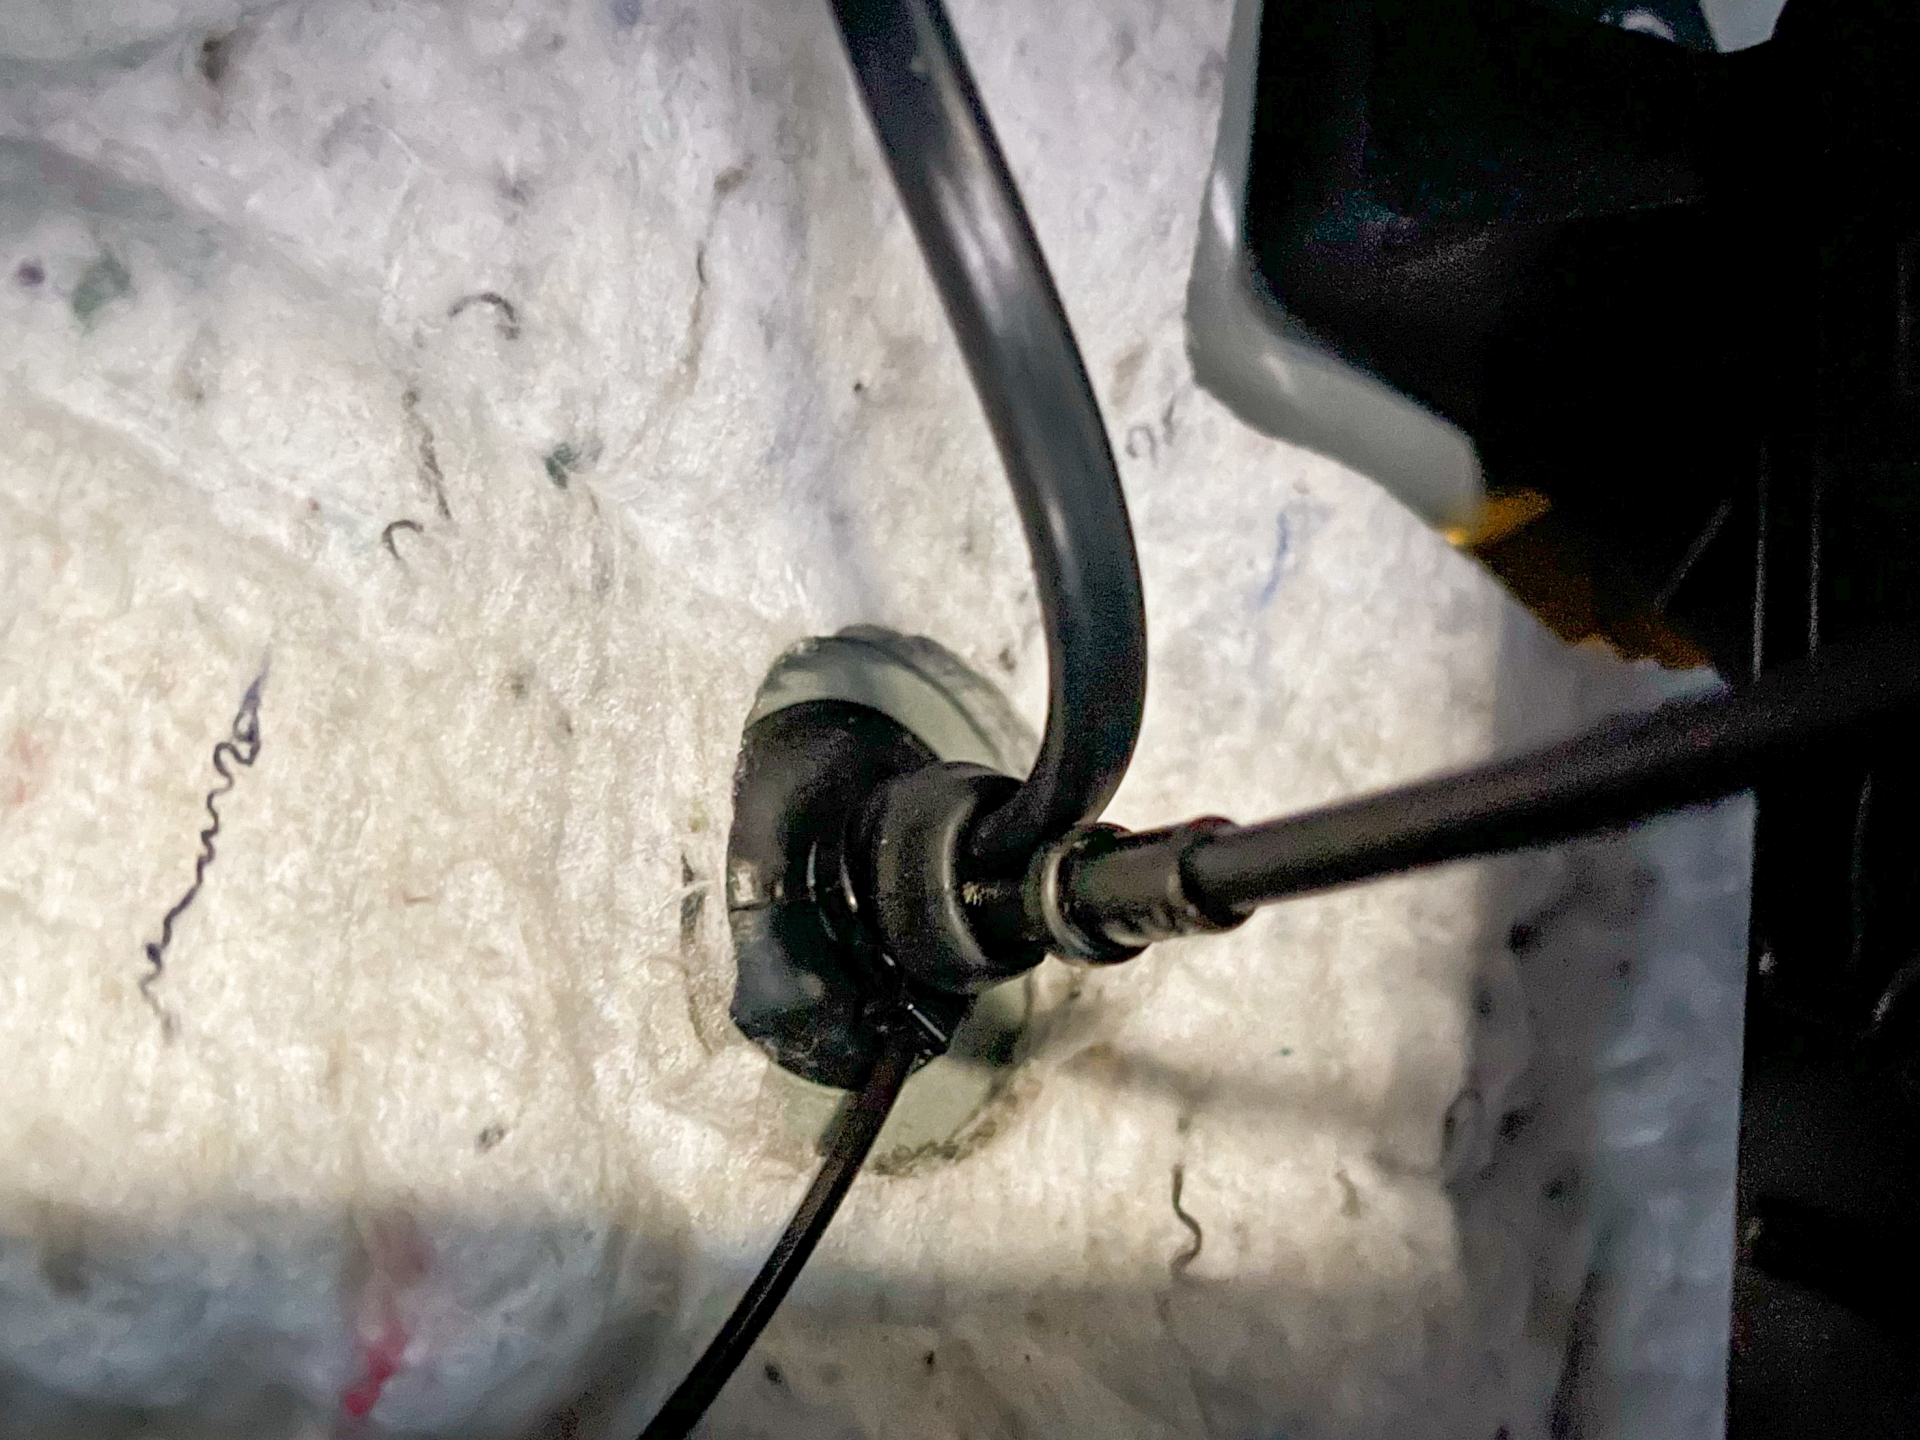
The larger conduit went on the outside of the rubber thingies where the tiny original went inside. New conduit is 12mm internal diameter.
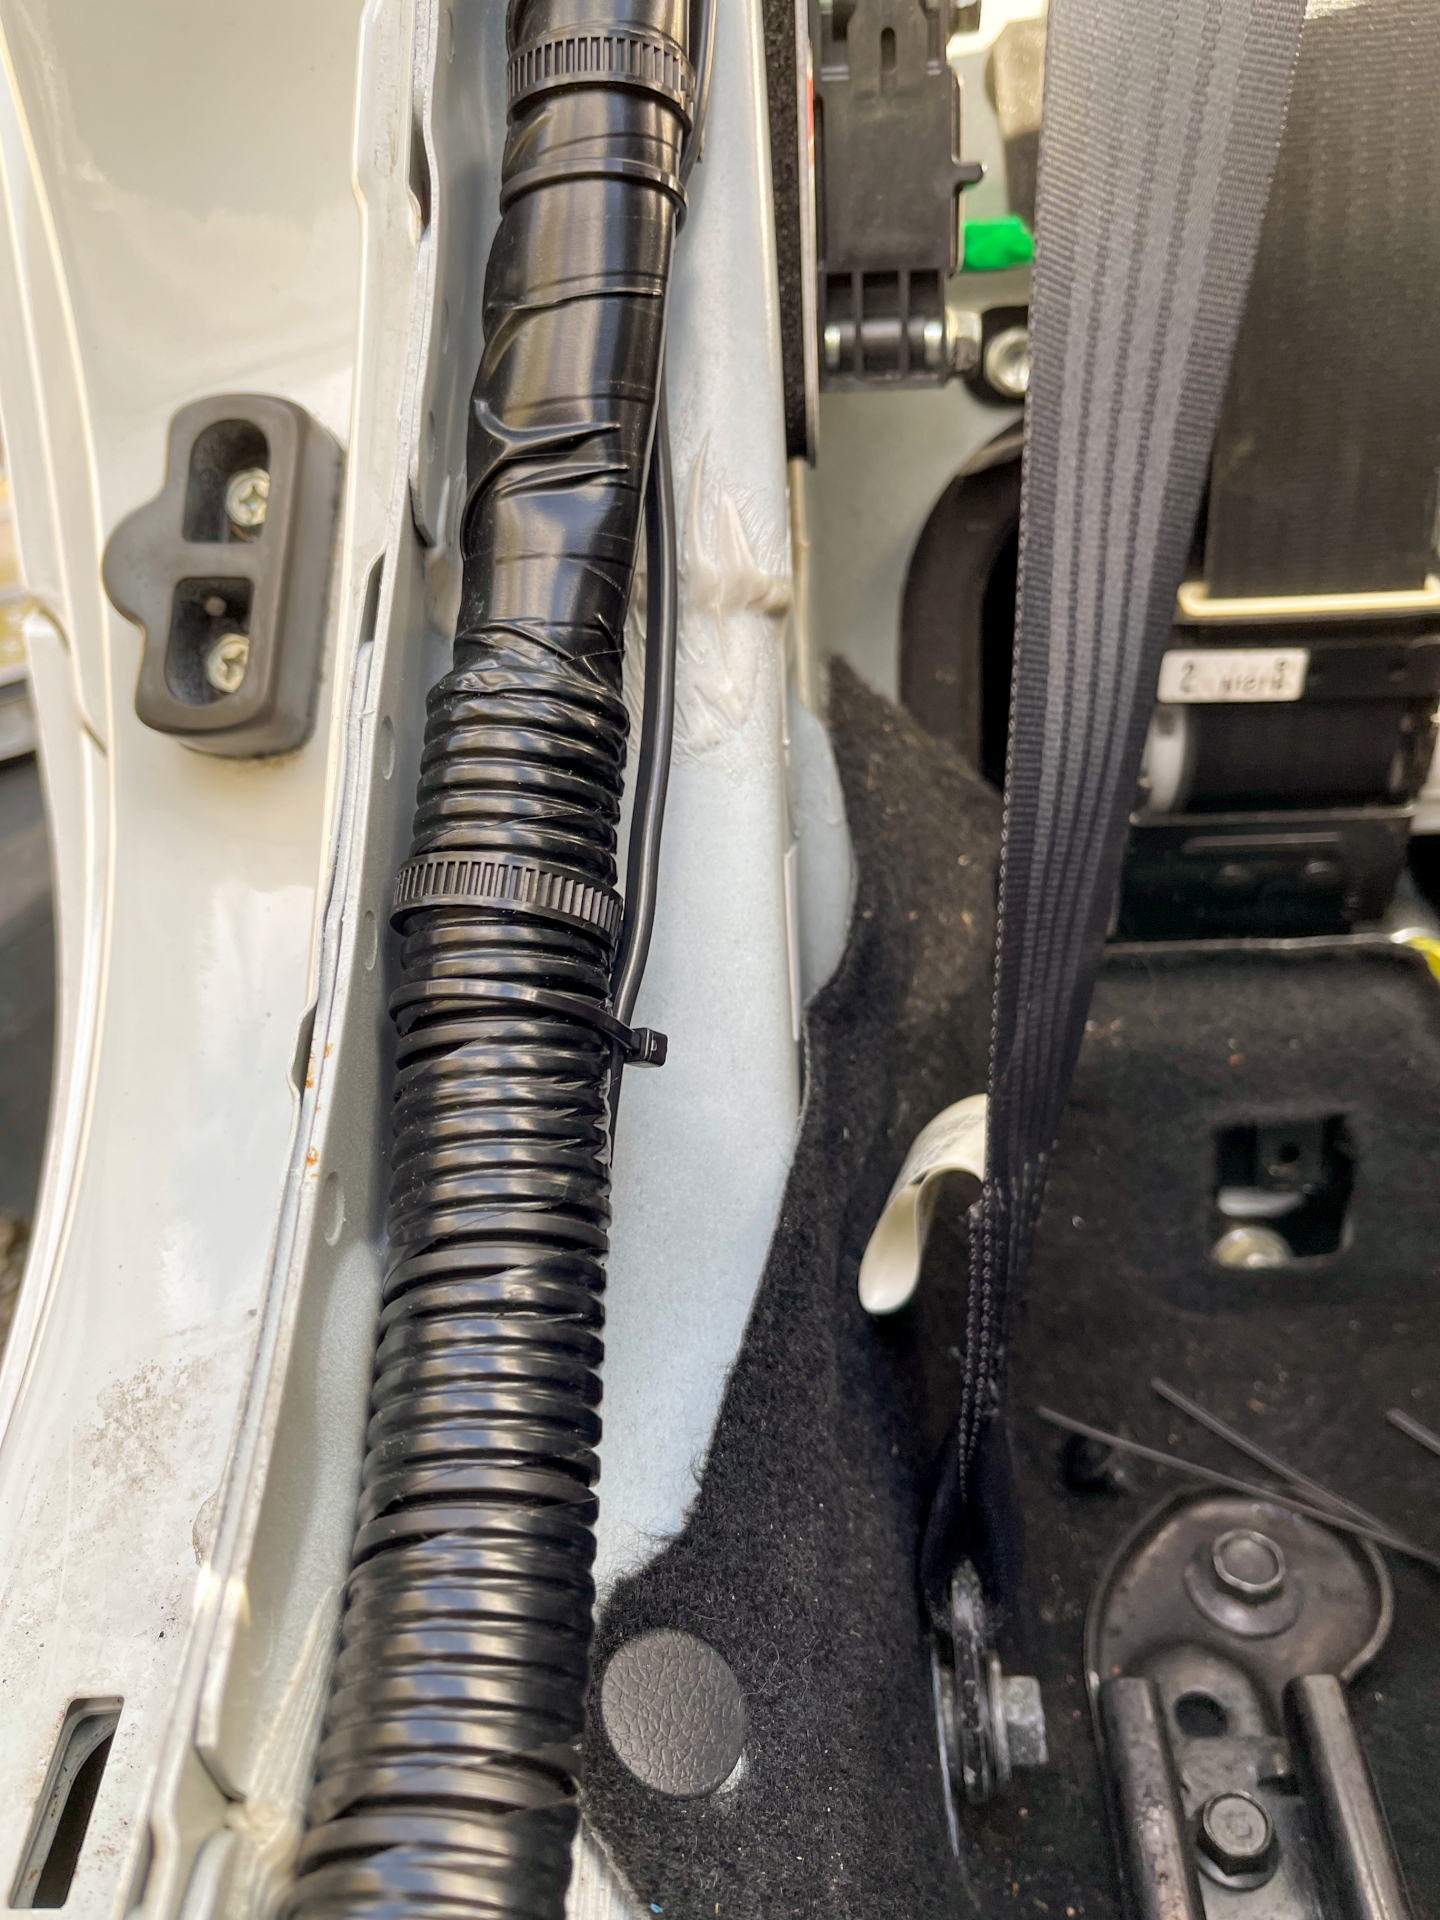
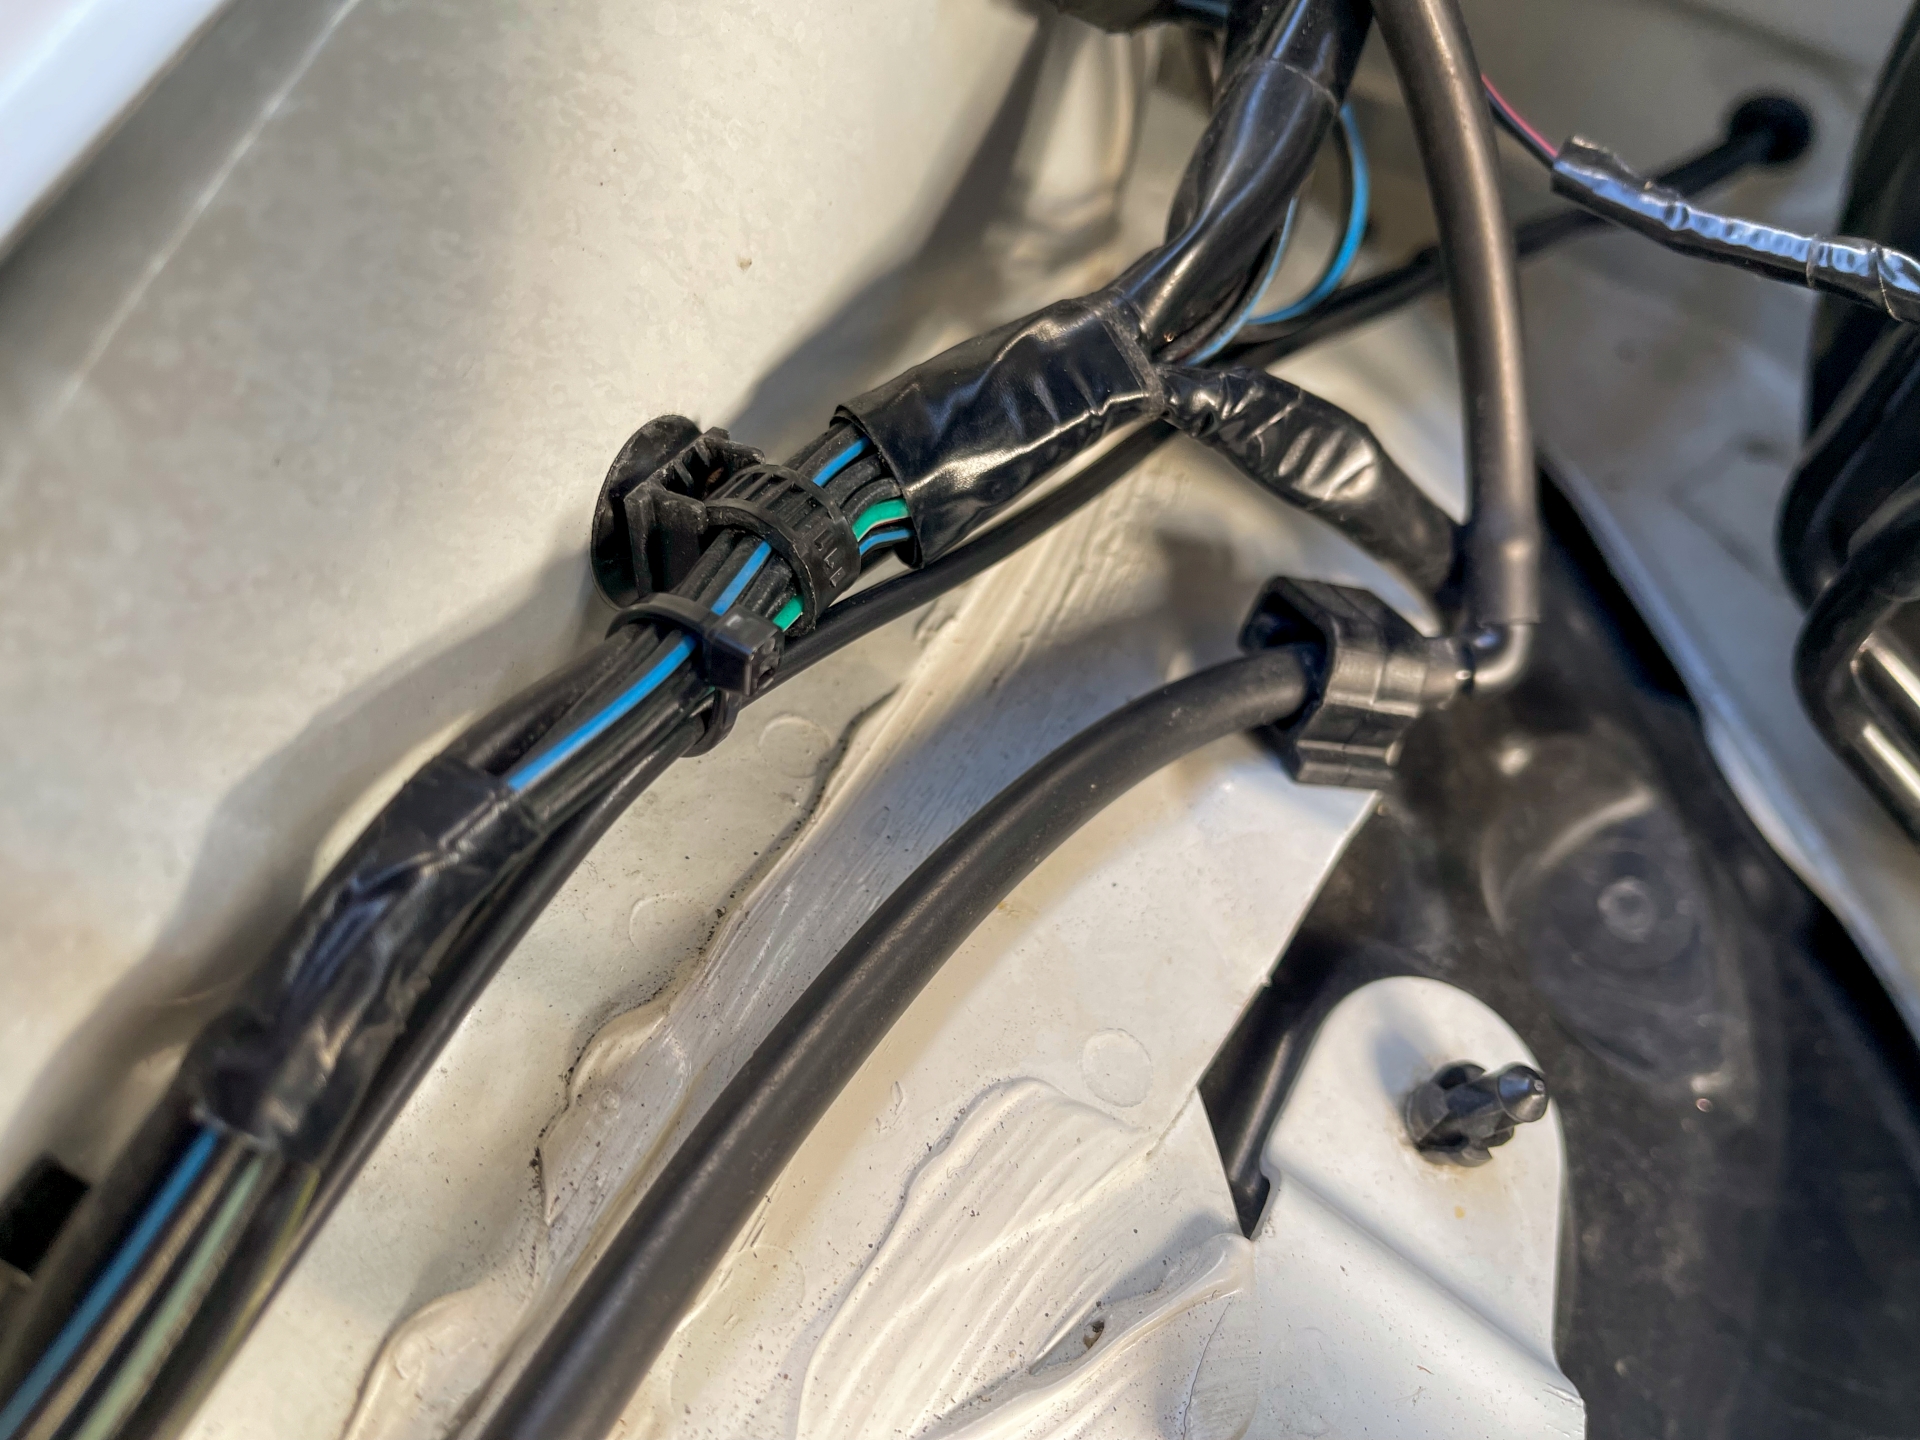
Connected up and tied up out of the way.
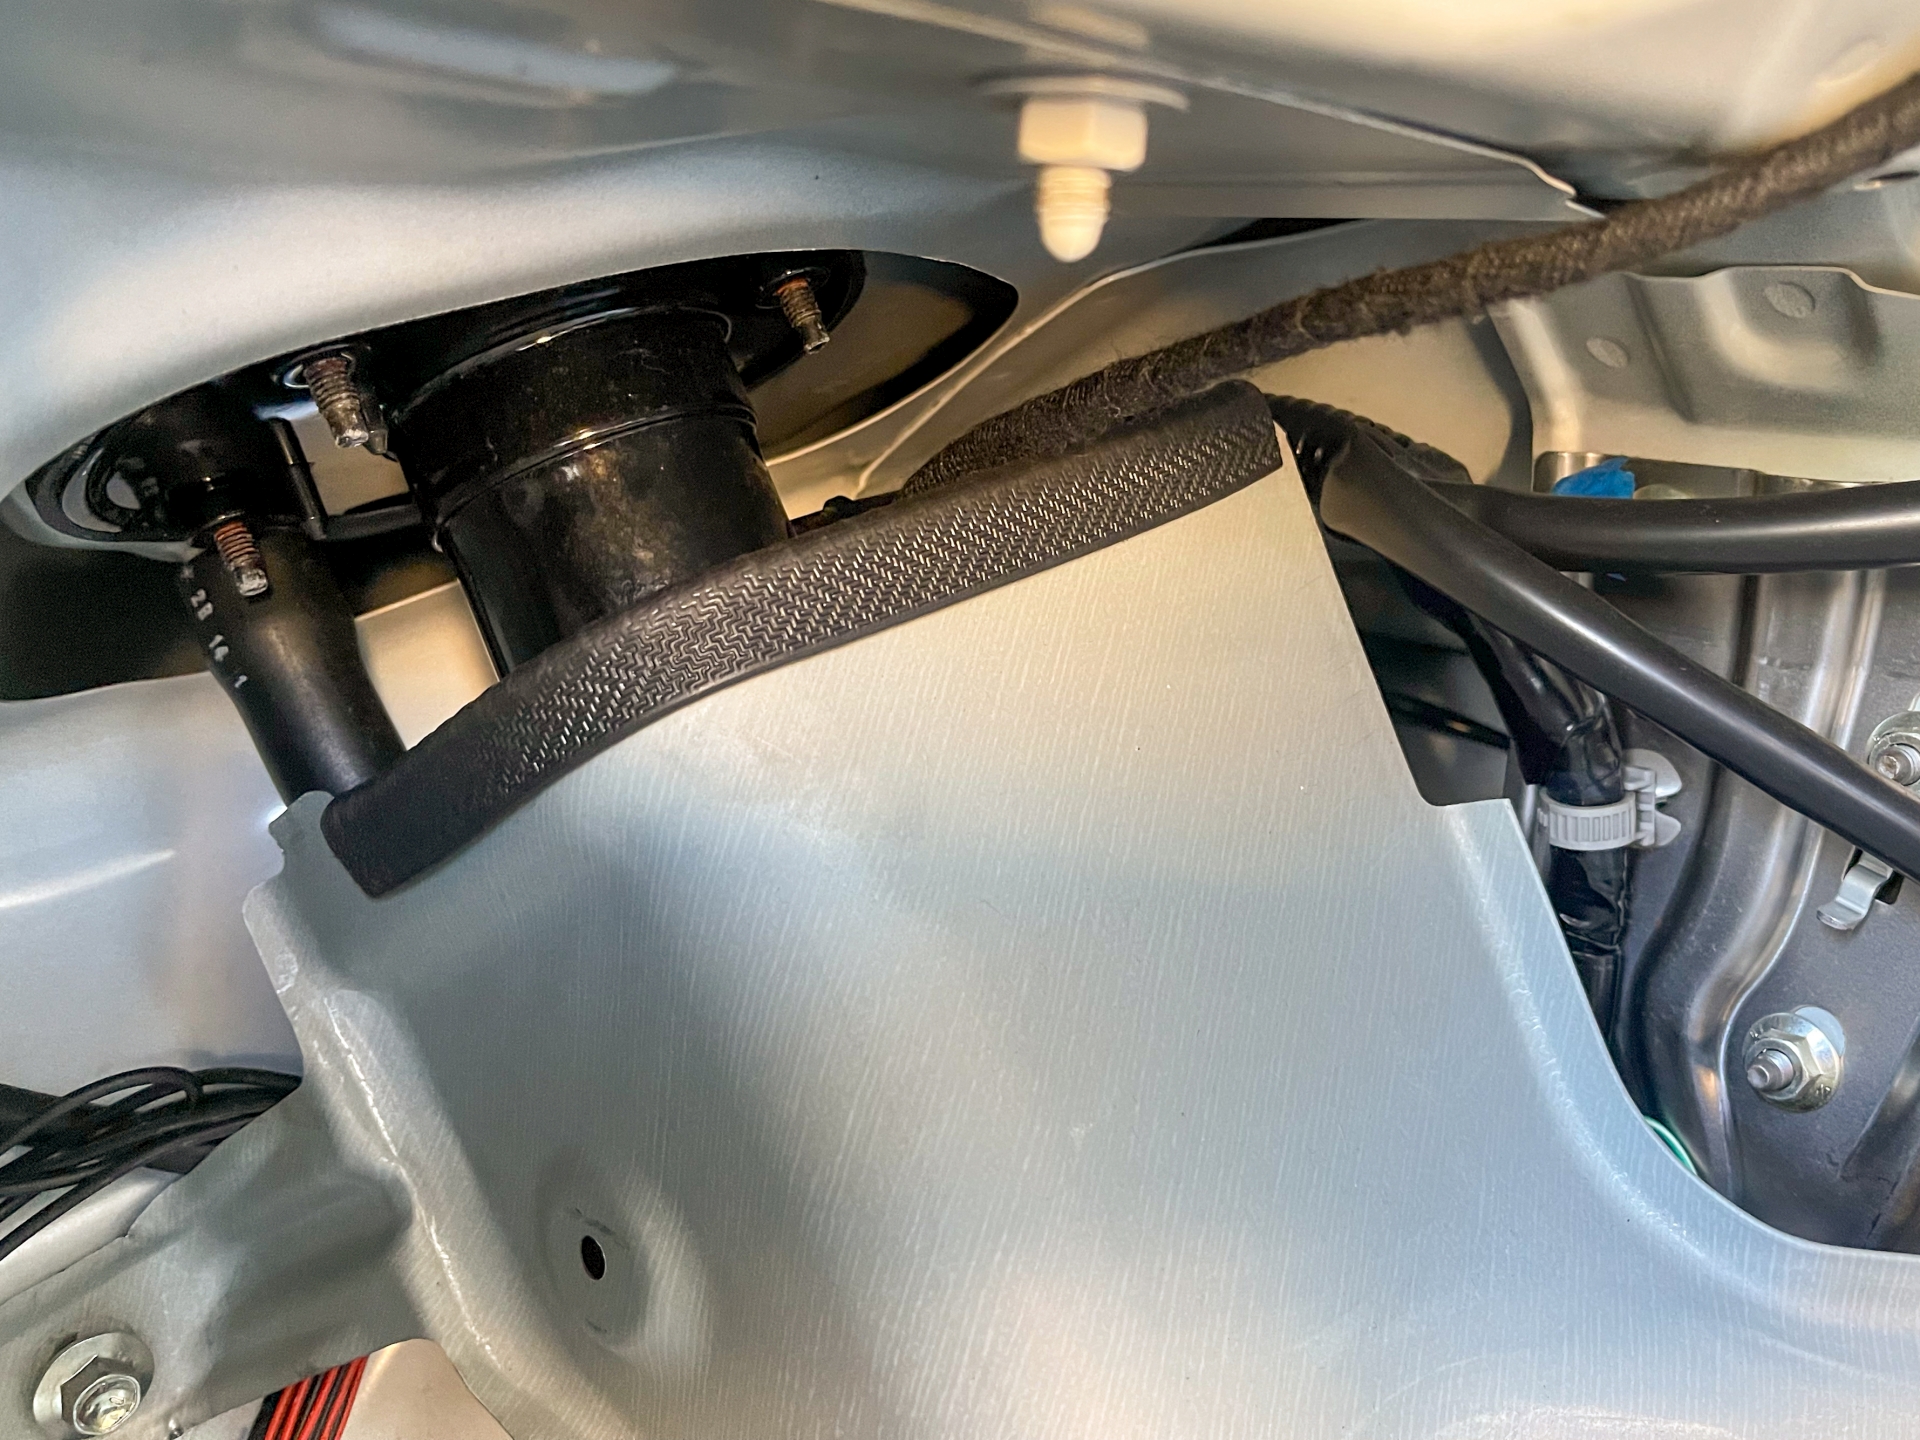
When fitting the metal shield back in place the cable would've rubbed on the sharp edge, so I used some leftover panel edging from the dashboard in the Discovery to protect it.
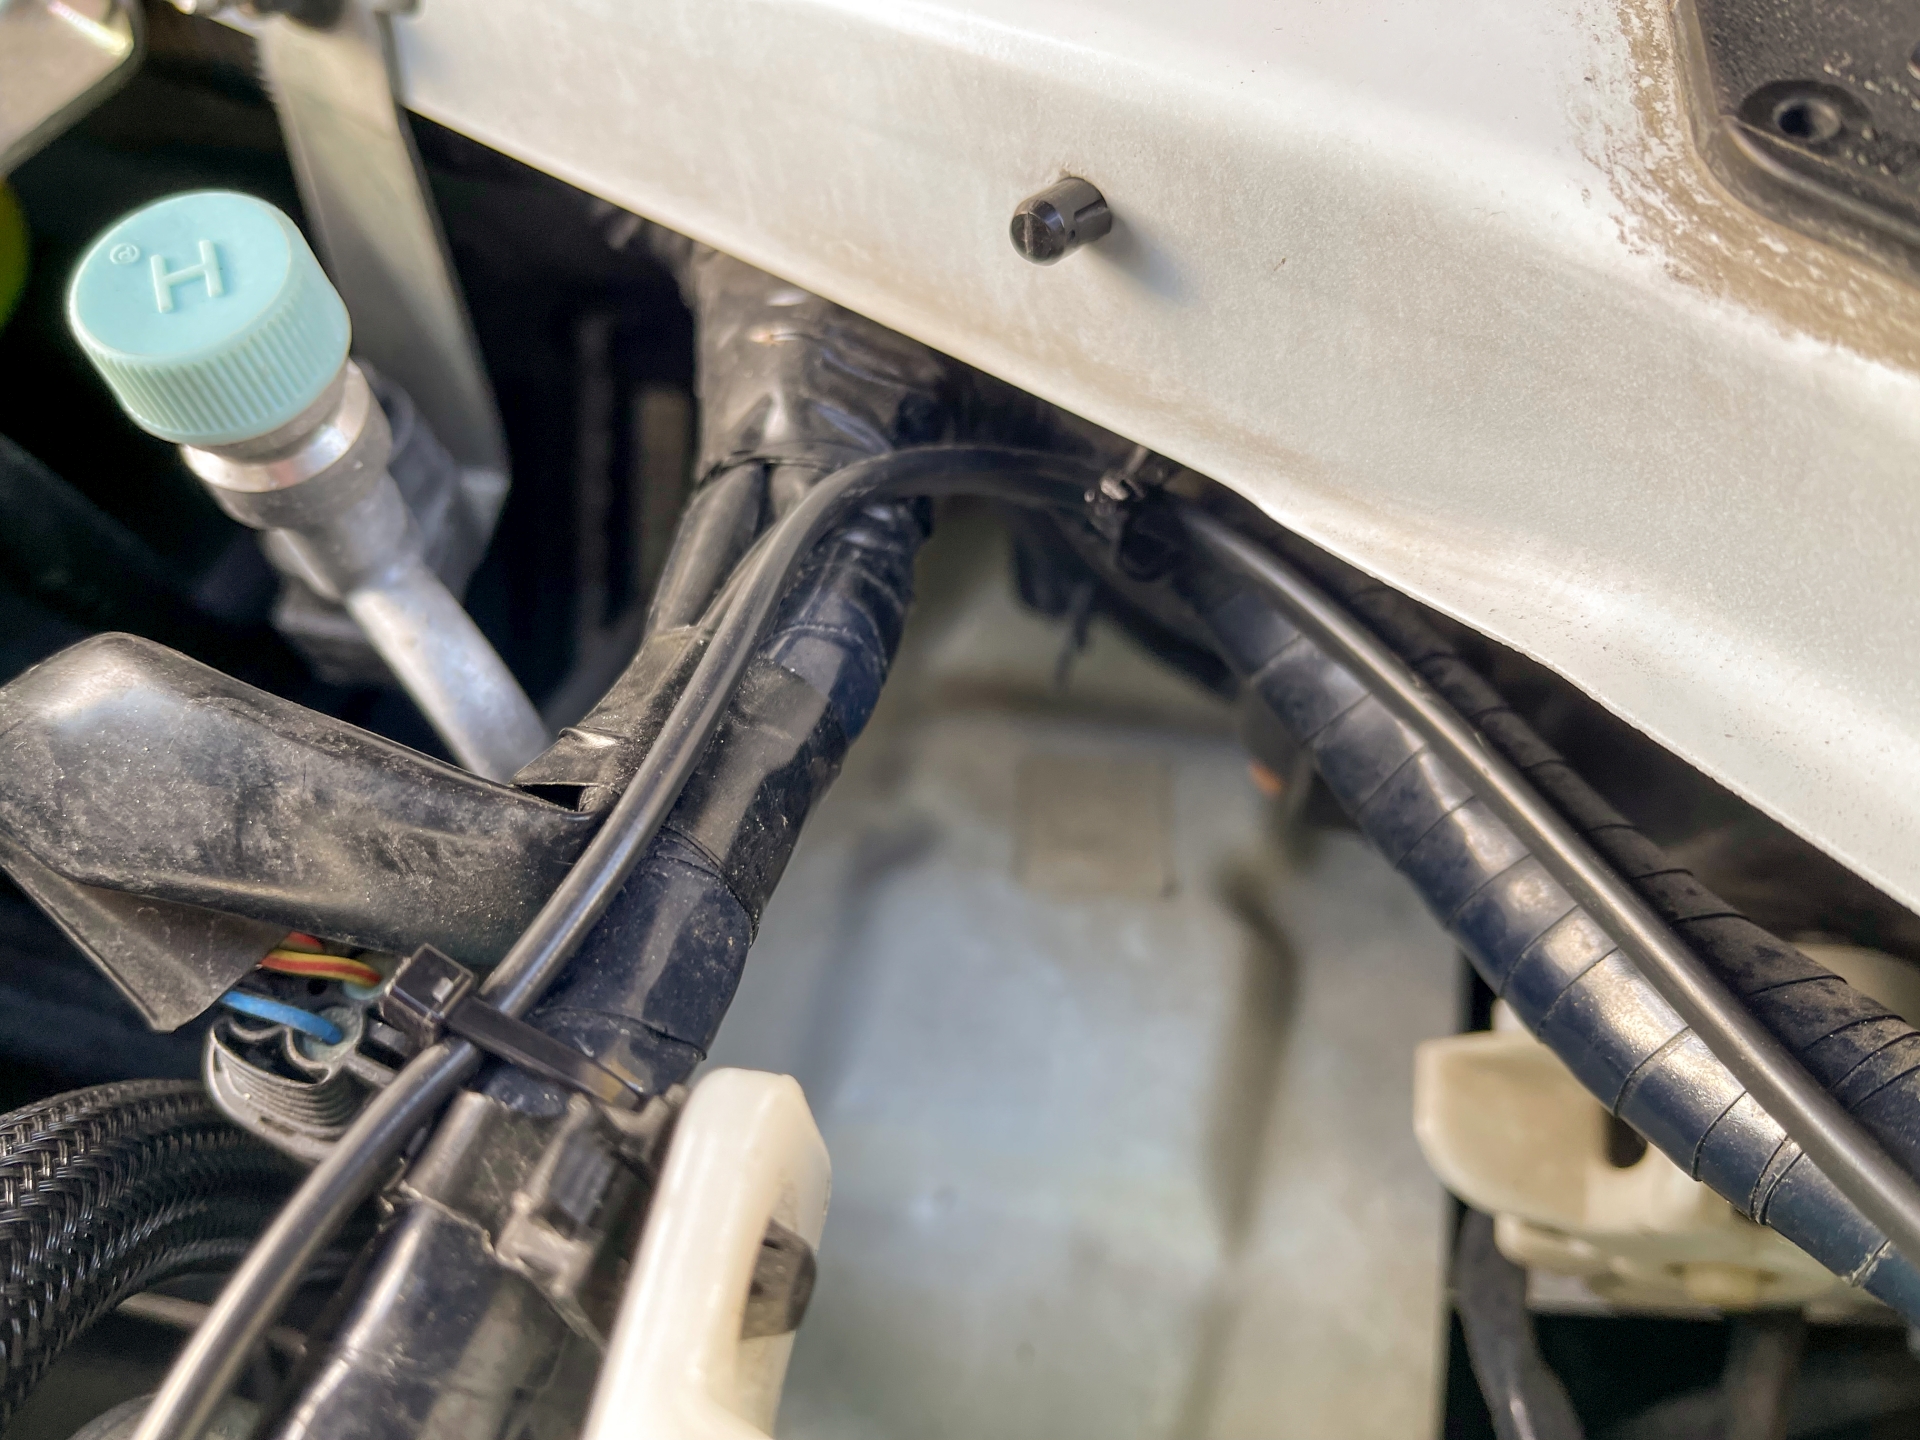
Then I vacuumed out the rubbish and whacked it all back together, didn't take pictures because it's boring. I replaced a number of the trim clips that were either missing or had been damaged somewhere along the line.
Finally a demo of the gauge showing the charge state with the engine running. It was indicating red when I first connected it up but there was still enough charge to start the car, I don't really trust these meters but it's the only panel connector I could get.